How to create a USB rescue kit for your PC
What you need to build a toolkit of essential free software, and where to get it

Windows PCs come on all sorts of different PCs desktops, laptops, tablets, 2-in-1s but they all share one thing in common: they can go badly wrong in lot of different ways, and identifying and fixing the problem can be tricky. Has your PC been hit by a malware infection, a hardware failure or have some important system files become corrupt? It's hard to know.
Fixing your own computer can be difficult enough, but if you're also expected to fix PCs belonging to friends and family members, then your job suddenly becomes much, much harder. In this issue's Weekend Project we'll show you how to create a portable USB rescue kit, packed with useful tools, that you can turn to in case of emergency.
What you'll need
The first thing you'll need for your rescue kit is a USB memory stick. You can, if you prefer, create a rescue CD or DVD, but modern PCs don't always come equipped with an optical drive. It's also easier to carry around a single memory stick than a data disc. It's also less likely to get damaged. Some USB flash drives even come with a keyring attachment, you can keep your rescue kit with your house keys, ready for when disaster strikes.
Almost any USB memory stick will suffice, but it makes sense to go for one which is at least USB 3 compatible, so you'll benefit from faster speeds that USB 3 ports provide. A 64GB drive should be large enough to hold all the rescue tools and any data you might need to recover from a troublesome PC.
The next step is to collate the tools you need to fix any PC problems you encounter.
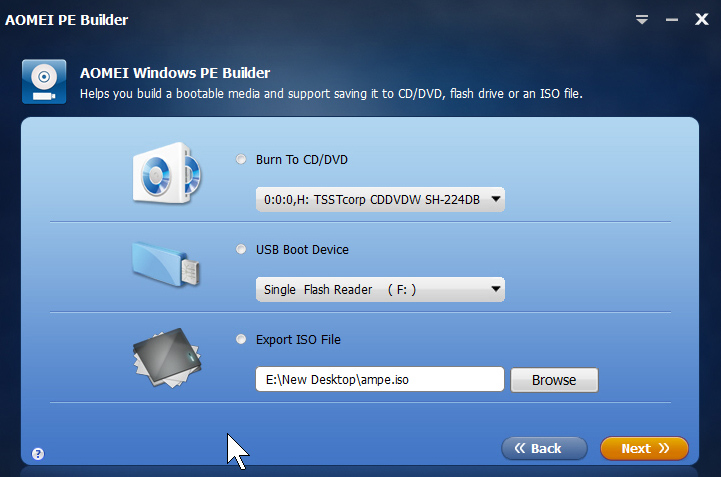
There are plenty of dedicated rescue toolkits that fit the task, such as AOMEI PE Builder which can create a recovery disc based on Windows PE (Windows Pre-installation Environment), which is a cut-down version of Microsoft's operating system.
Alternatively, you can create a Windows 10 Recovery Drive (below), which doesn't have as many tools but is a useful quick option.
Get the ITPro daily newsletter
Sign up today and you will receive a free copy of our Future Focus 2025 report - the leading guidance on AI, cybersecurity and other IT challenges as per 700+ senior executives
How to create a Windows Recovery Drive
Step 1
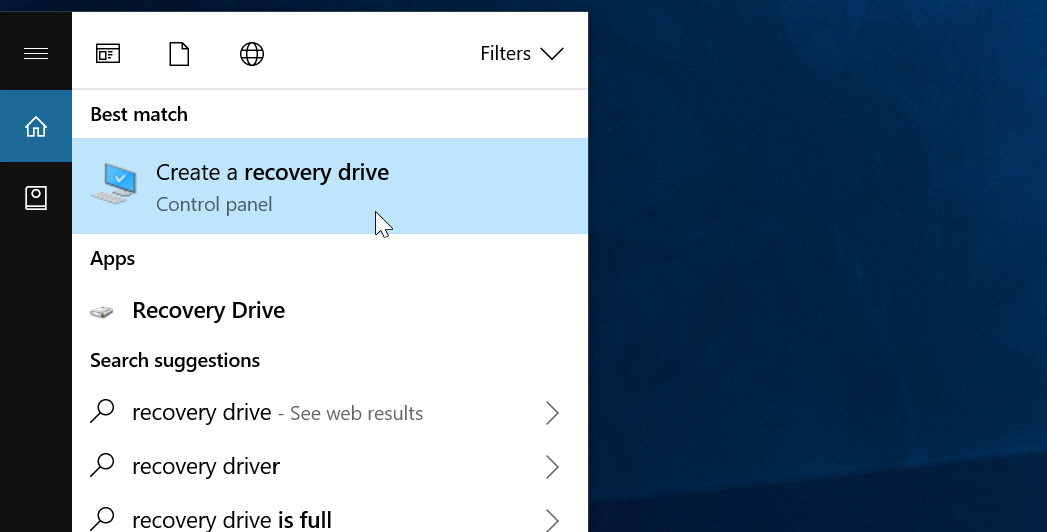
Windows 10 lets you create a USB recovery drive that includes a selection of useful troubleshooting tools, and can even reinstall Windows if necessary. To launch the tool, type 'recovery drive' into the Windows search box, then click on 'Create a recovery drive'. The wizard will open.
Step 2
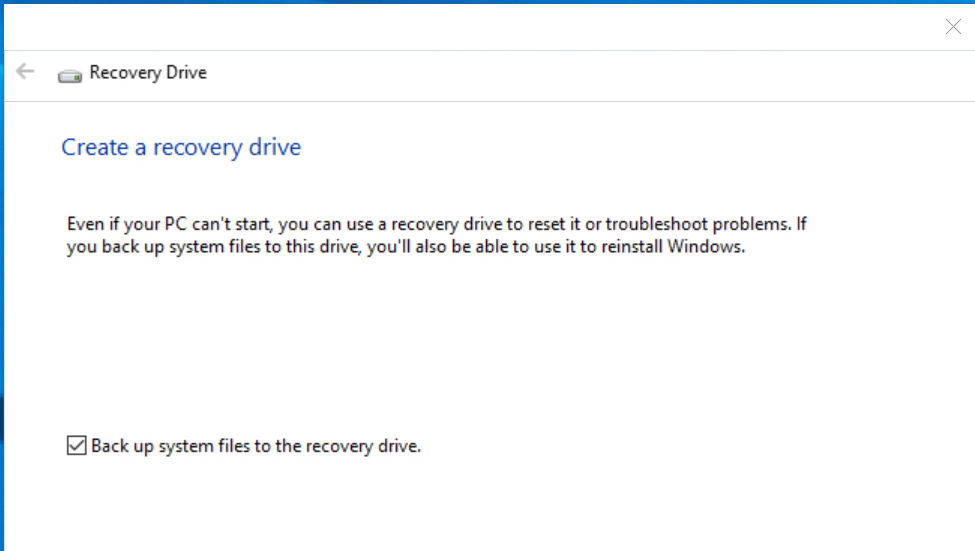
The first question you will be asked is whether you want to 'Back up system files to the recovery drive'. This lets you use the drive to reinstall Windows, so say yes if that's something you want to be able to do. Click Next, and select the correct drive when prompted.
Step 3
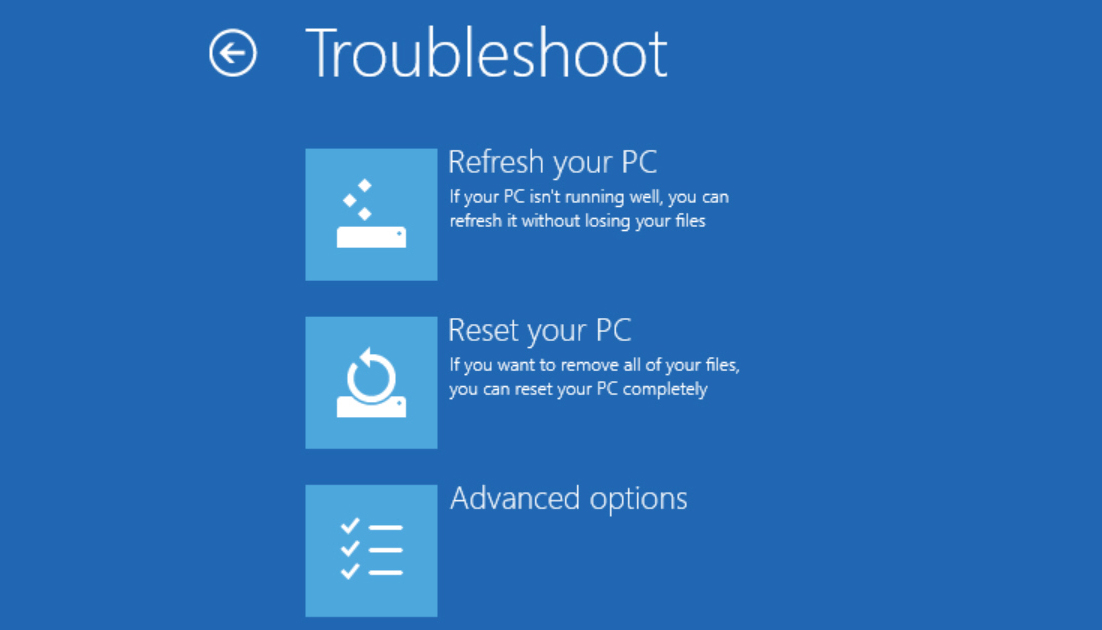
Click Create. If you see a message asking you to format the drive, ignore it. The creation process will take a while, especially if you're backing up system files. When done, click Finish. When you boot into the drive, you'll be able to refresh or reset your PC, and access troubleshooting tools.
Best portable tools
The best type of recovery kit is one you build yourself. There's a huge range of portable tools available, but here are some of our favourites to get you started.
You'll definitely want to include a browser in your toolkit, unless you want to be stuck using Microsoft Edge or worse still, Internet Explorer on someone else's PC, so it makes sense to take Chrome with you. The link above will let you download the very latest version of the browser.
Windows Password Recovery Tools
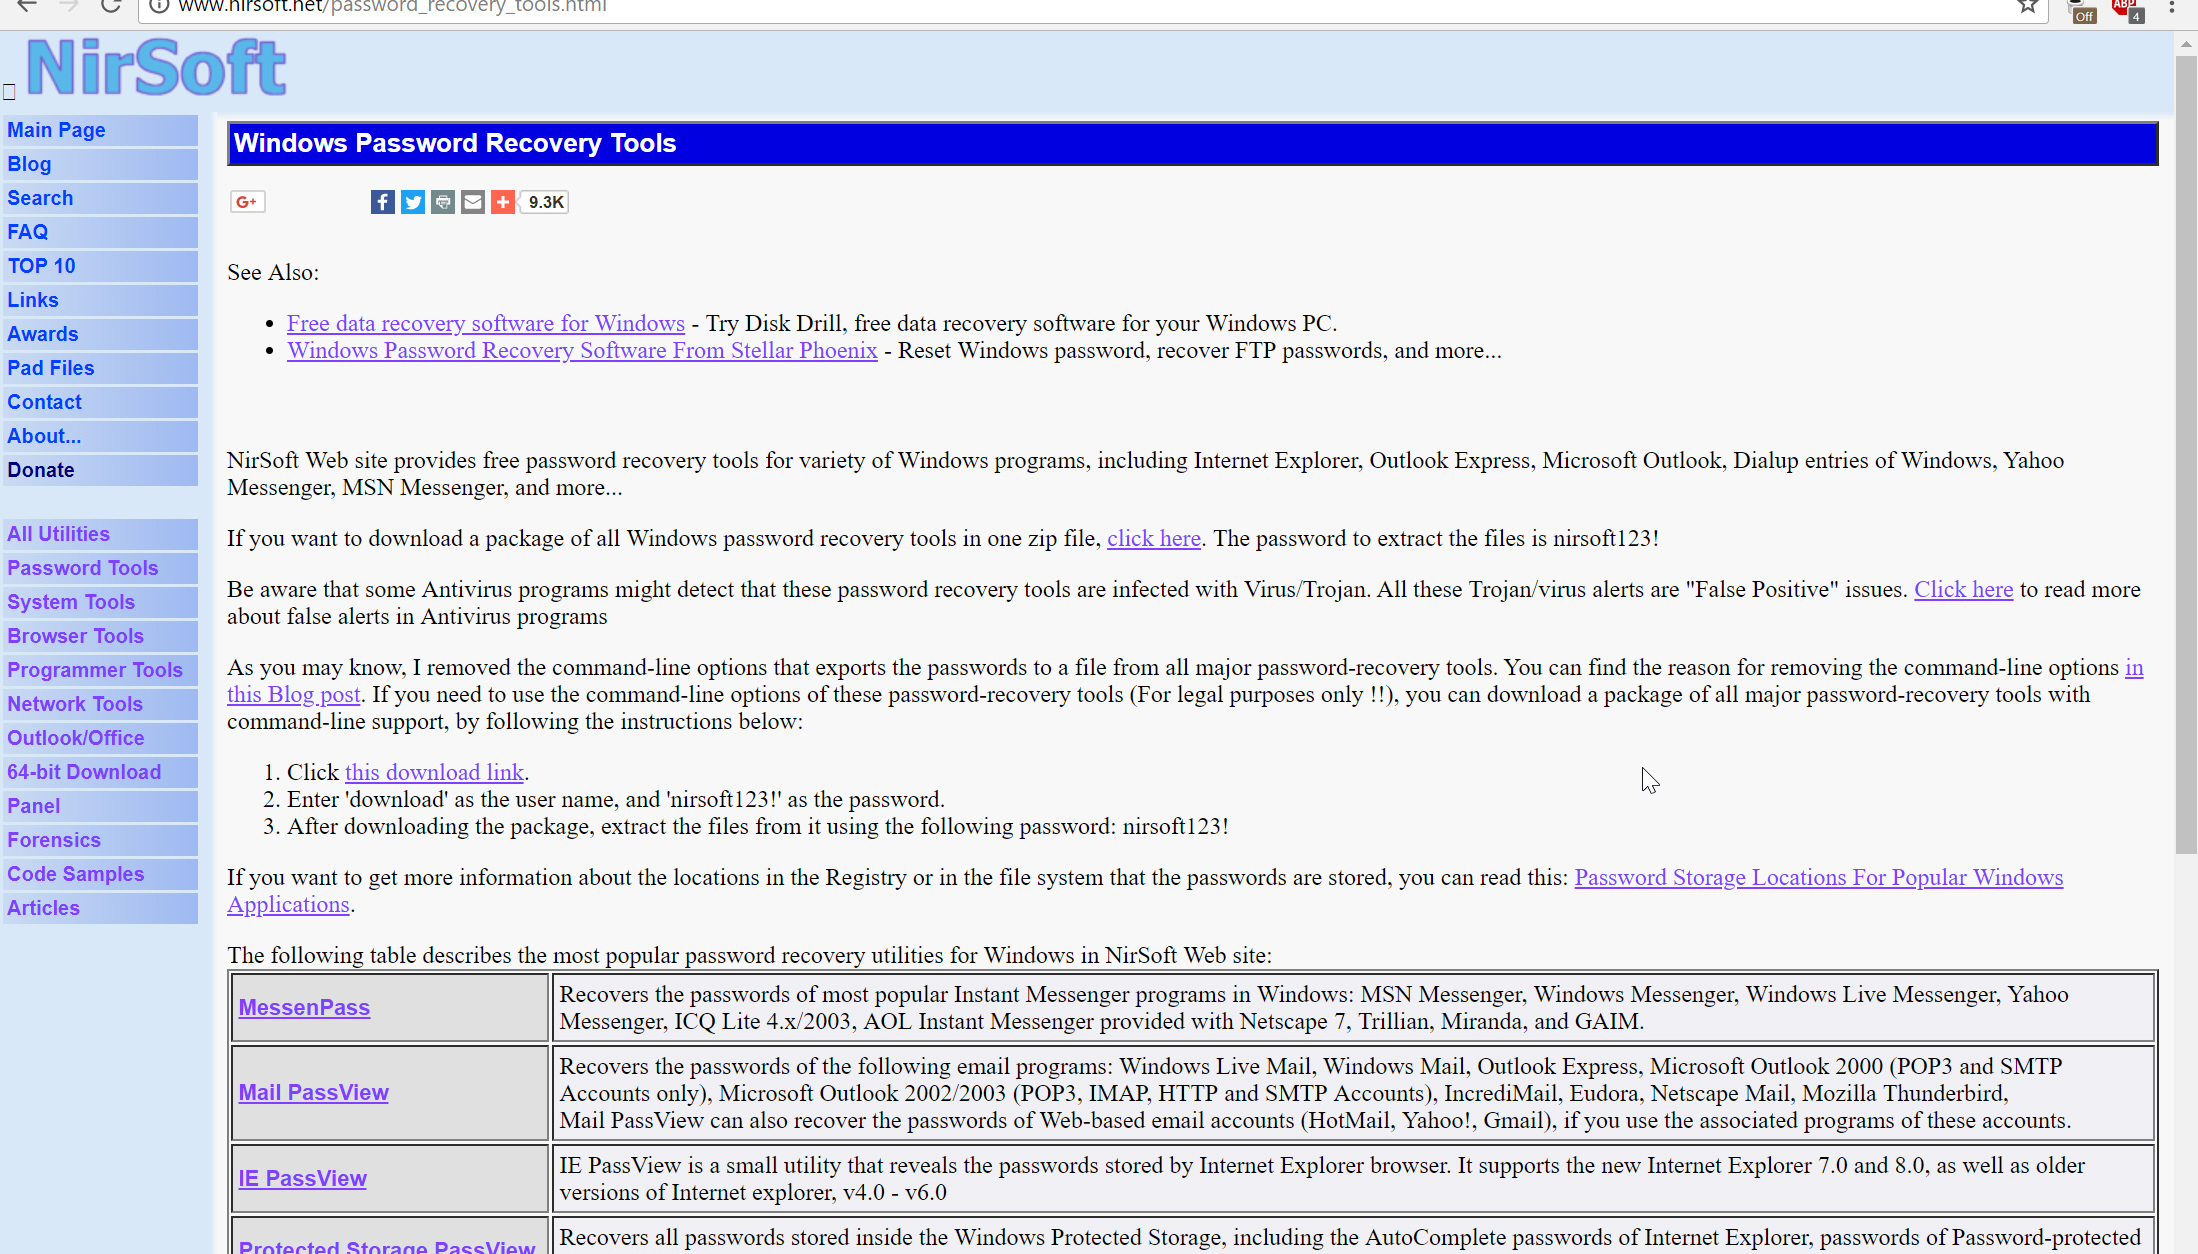
Nirsoft offers a number of tools designed to recover lost usernames and passwords, which might come in handy if simply resetting your password isn't an option. There are password tools for instant messengers, routers, browsers, wireless networks and more. You can download all of the tools in a single zip file (enter 'nirsoft123!' as the password).
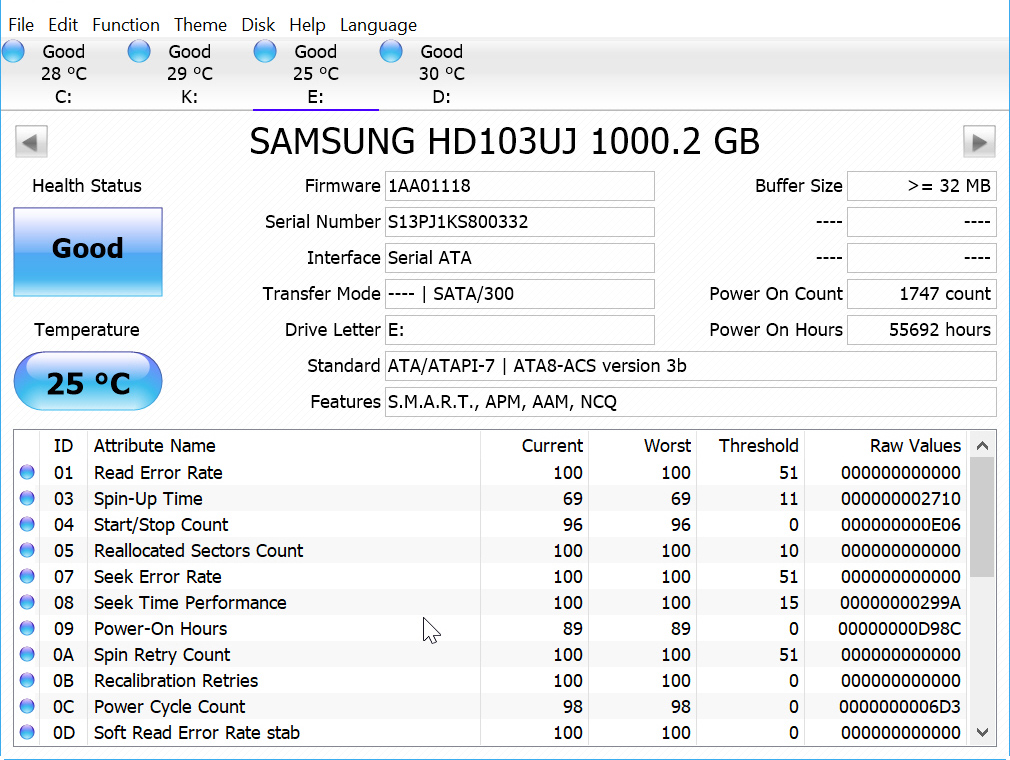
If you suspect one or more of the PC's hard drives is failing, CrystalDiskInfo can tell you for sure. It displays the drive's S.M.A.R.T (Self-Monitoring, Analysis and Reporting Technology) status and current temperature, along with details such as the number of hours the drive has been on for, and the read-error rate.
If you need to fully remove unwanted applications or browser junk, IObit's Uninstaller is the tool for the job. It can batch uninstall multiple items, then identify and remove any leftovers afterwards.
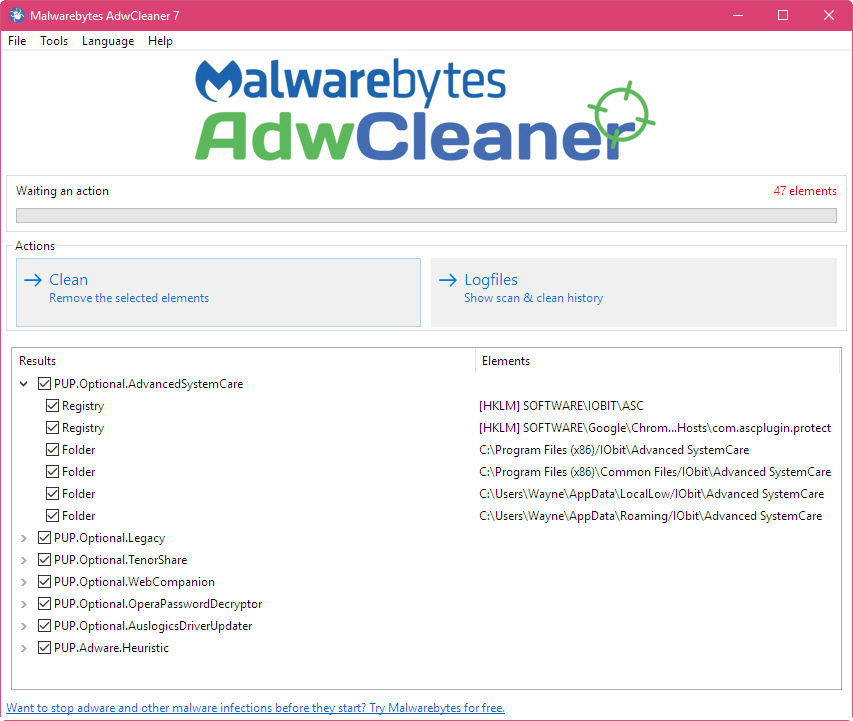
AdwCleaner can remove toolbars, adware, hijackers, and PUPs (potentially unwanted programs) from your web browsers. It's very easy to use, you just run it and then click the Scan button, and it will present you with its findings.
If the problem PC keeps crashing and ends up on the 'blue screen of death' (BSoD), this program can narrow down the cause by scanning all the minidump files created during a crash, and making them available to study.
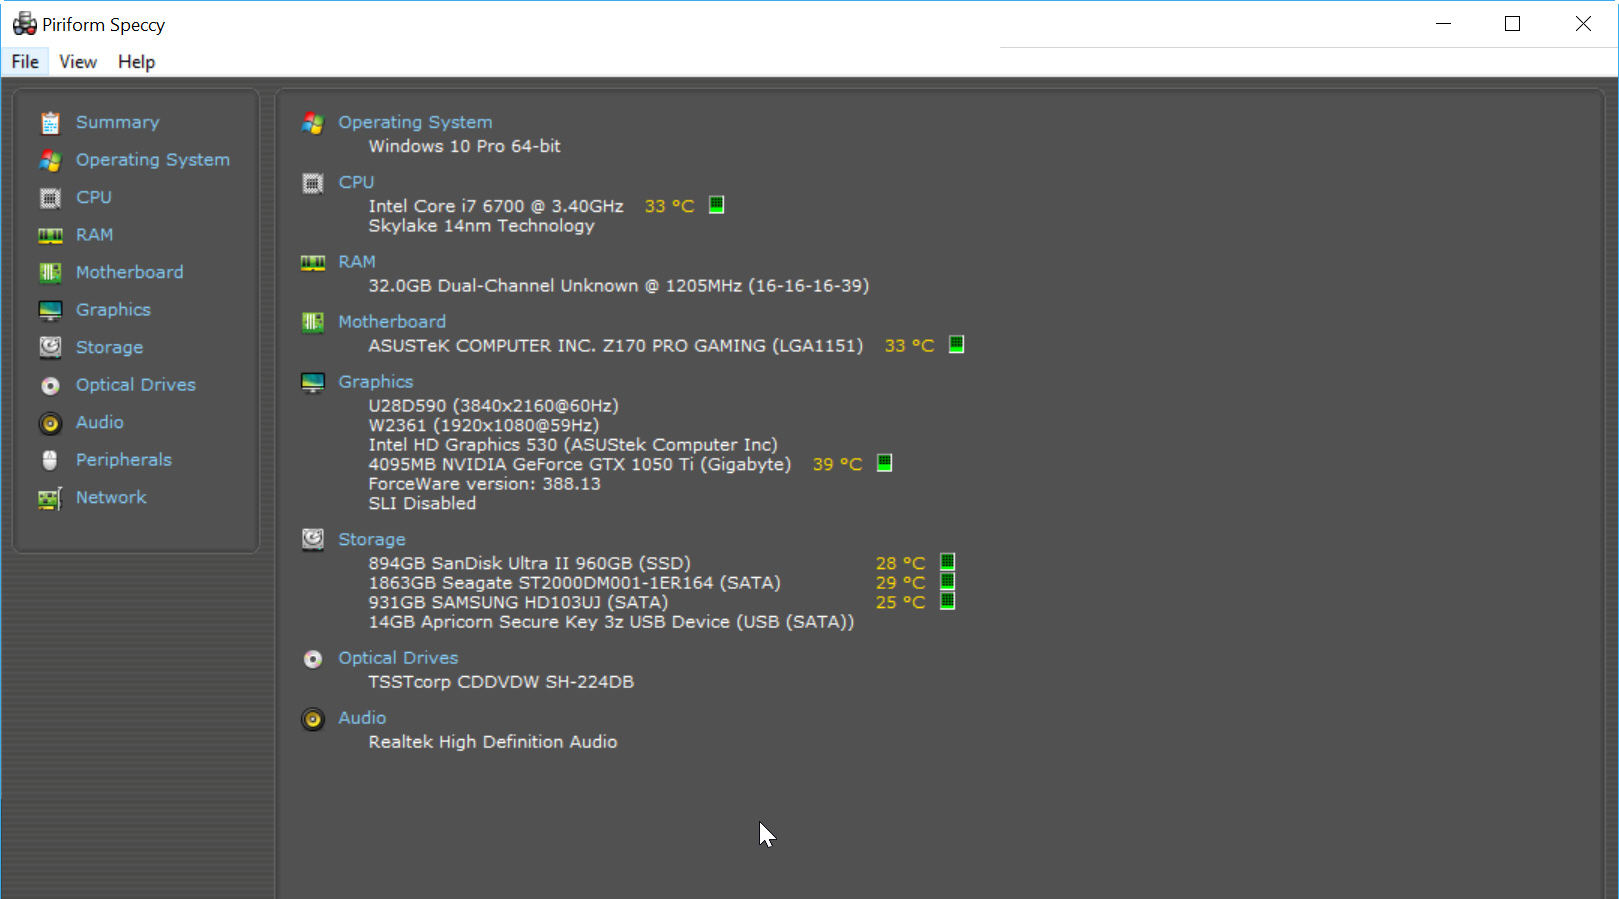
Speccy is a fast, lightweight, system information tool from Piriform, the creators of CCleaner. It can tell you everything you need to know about a PC, from the version of the operating system it's running to the hardware inside. You can even use it to monitor the temperature of all of the core components.
Like BlueScreenView, WhoCrashed will search your crash dump logs, tell you the cause of your woes, and offer suggestions for fixing the problem. The download is an installer, but you can then copy the program's folder to a USB flash drive and run the executable file from there.
A very useful Nirsoft tool, it helps you find the Windows key of the PC you run it on, as well as several other registration keys.
Process Explorer displays a list of running processes and colour codes them to make it easier to see what they are. You can scan suspicious entries using the VirusTotal.com online virus checker.
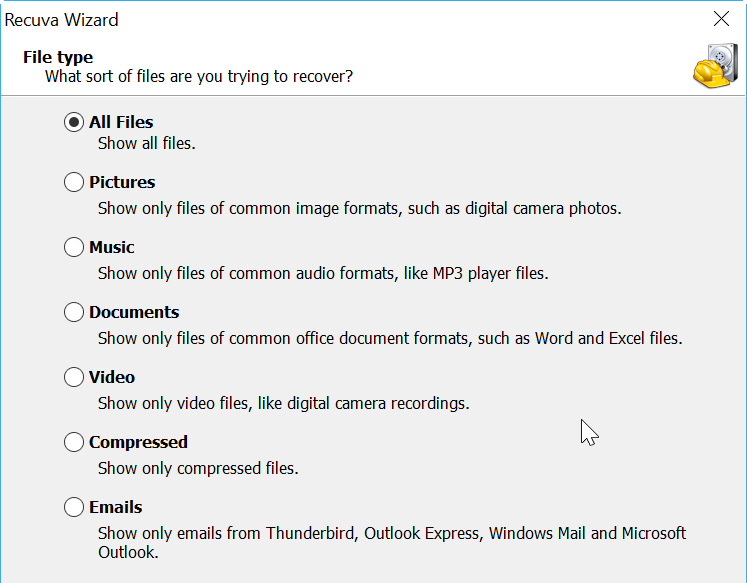
If you, or someone else, has accidentally deleted some important files, you can use Piriform's Recuva to find and restore them. Running it from a flash drive rather than the PC's hard drive means there's less likelihood of you overwriting the files you're trying to recover.
Create a rescue kit using PortableApps
You can just manually drop each of the tools listed above into their own folders on a USB memory drive, then run them as and when they're required. However, another option is to create a rescue kit using PortableApps.
This is a Start menu and organiser, which even comes with its own built-in app store to make it easier to find and install the latest tools. You don't have to worry about updating your apps either, as the software makes it easy to download the most up-to-date editions.
We'll show you how to put this together in the mini-workshop below.
Assemble your toolkit using PortableApps
Step 1
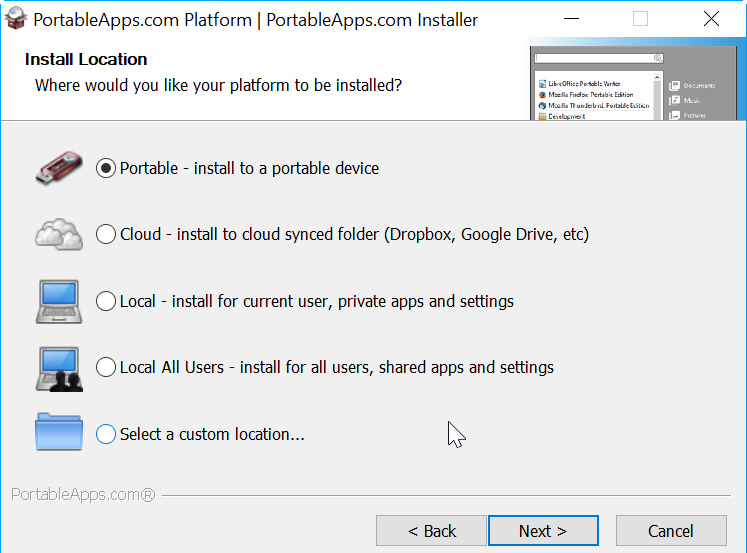
Insert a USB memory drive into a spare port on your PC, then download the PortableApps program to your desktop and run it. During installation select Portable as the location to write the software to. On the next screen, select the drive to install to (make sure you pick the right one).
Step 2
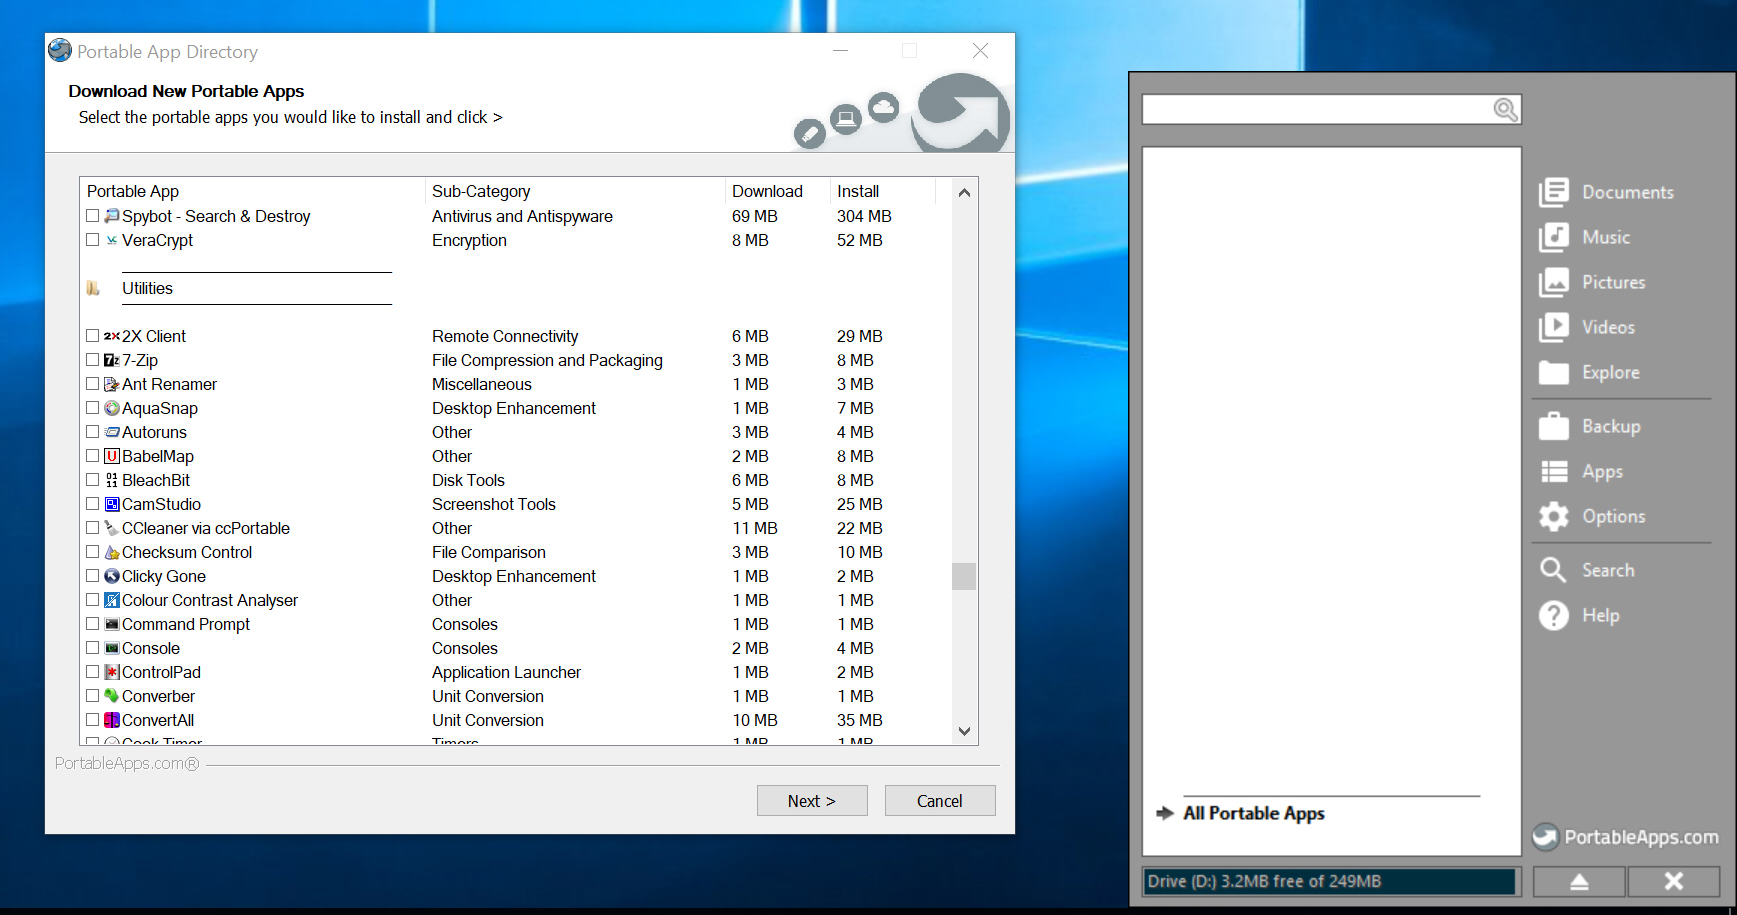
When you run PortableApps on your drive, a blank Windows 7-style Start menu appears, along with the Portable App Directory. The directory lets you find apps to install. Chrome can be found under Internet, which is sensible enough, while the likes of CrystalDiskMark and IObit Uninstaller are under Utilities. Tick the ones you want.
Step 3
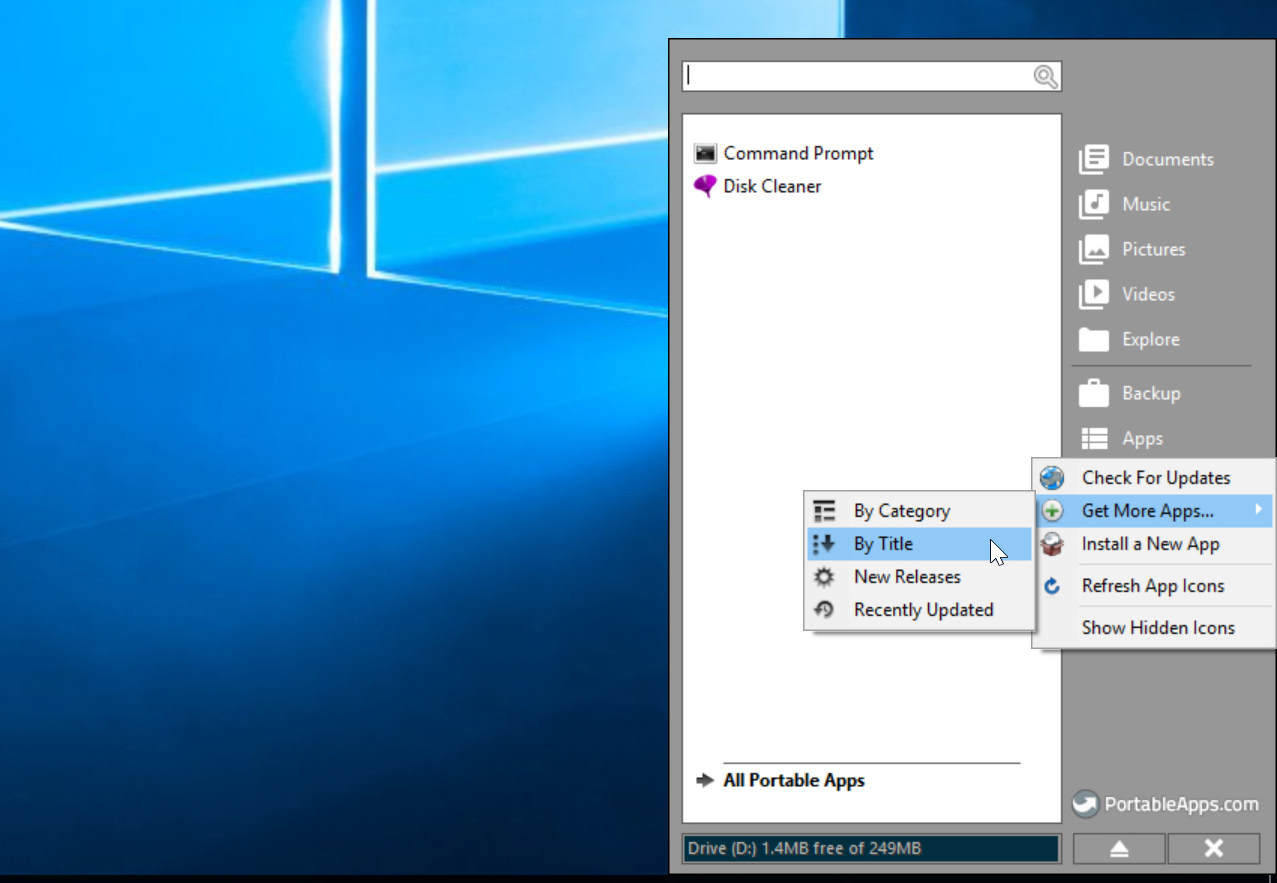
When you've chosen some programs, click Next. Your selection is downloaded and installed, which might take a while. Once it's finished, the installed apps appear in the menu, ready to be launched. You can also access the App Directory by clicking the Apps button in the menu, and selecting 'Get More Apps'.
Image: Shutterstock