How to use the Microsoft Office ribbon
In this guide, we explain how to use the Microsoft Office ribbon so you can make your work more efficient


The Microsoft Office suite is among the best online collaboration tools with numerous useful features, not least the ribbon.
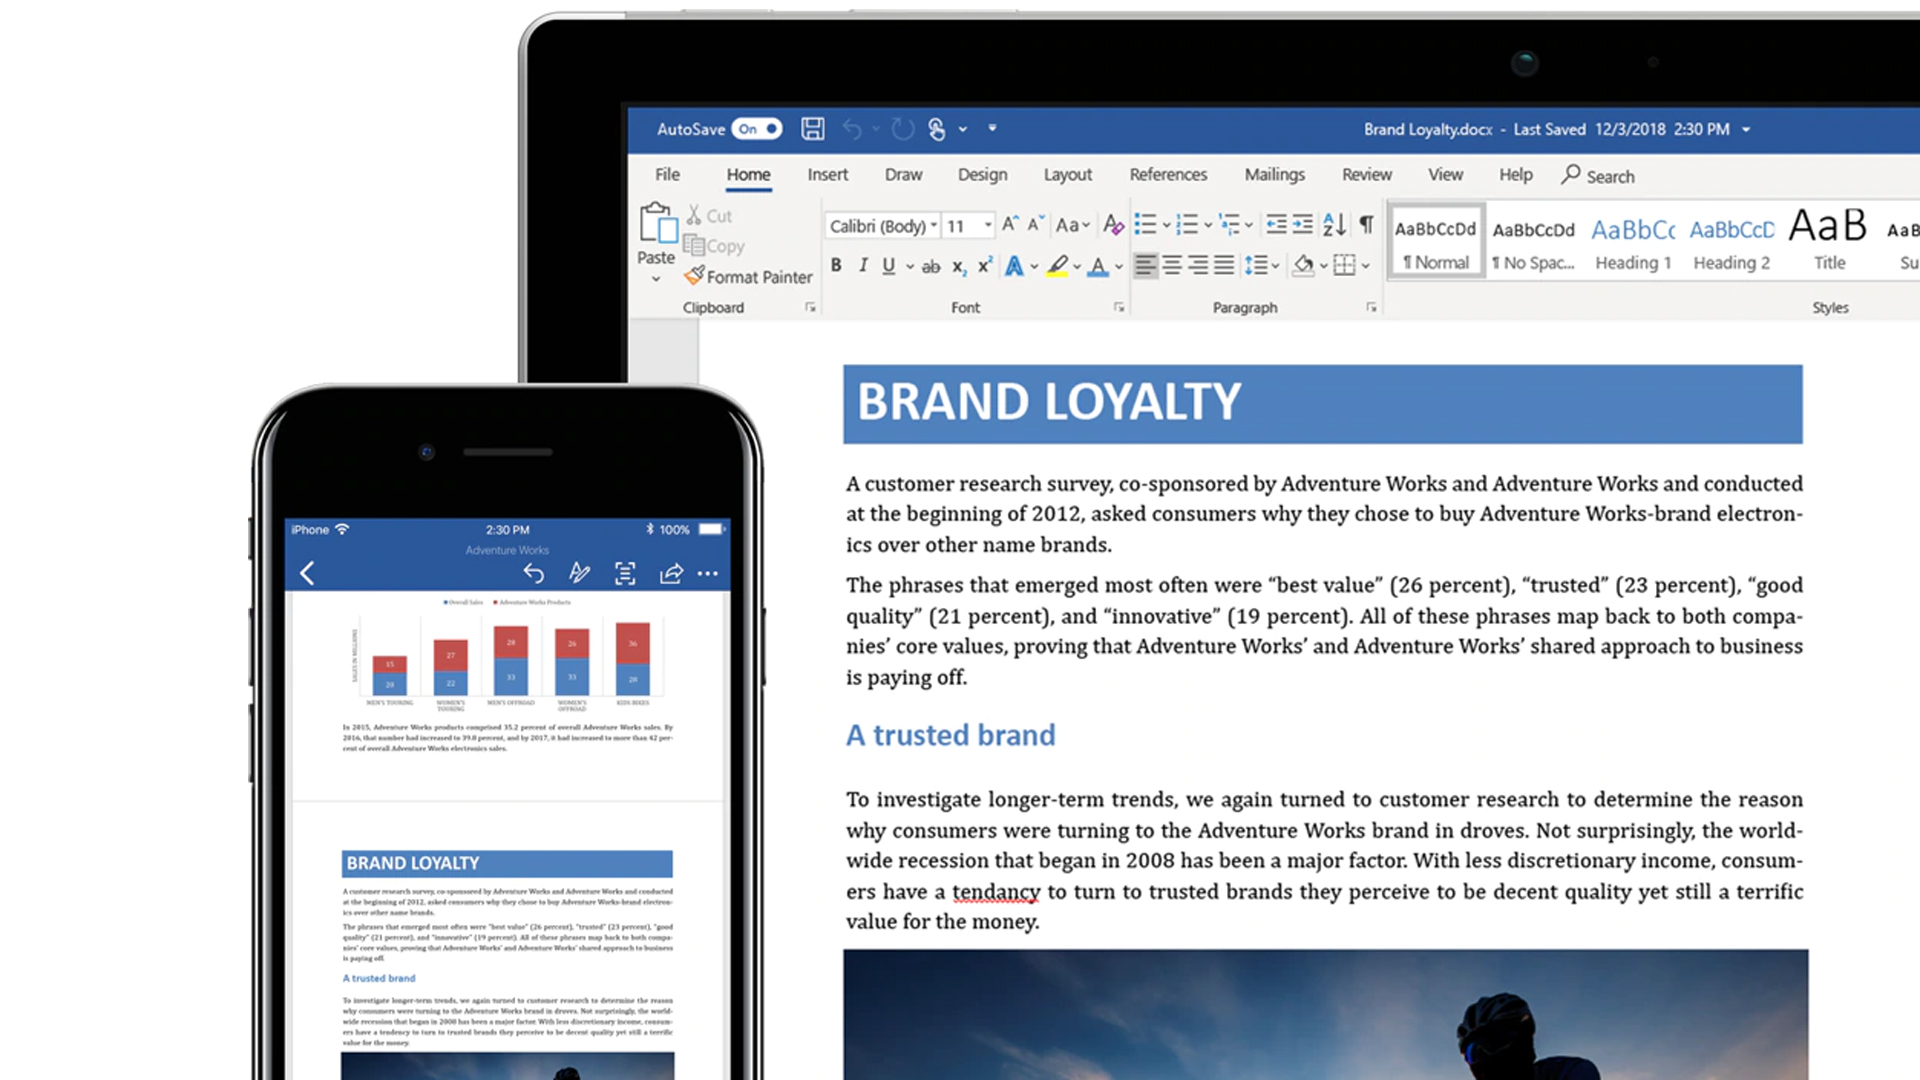
The ribbon is a set of toolbars at the top of the screen that appears in various Microsoft Office programs, including Word, PowerPoint, Excel, and OneNote, and enables users to intuitively find tools in a minimal number of clicks.
In this guide, we’ll explain how to use the Microsoft Office ribbon and the various features it has to offer so you and your team can efficiently use Microsoft’s programs.
What is the Microsoft Office ribbon?
All versions of Microsoft Office since Office 2007 have had the ribbon in some form. It appears at the top of the screen underneath the file name and enables you to choose between tabs that display the tools—called commands—you can access. Each tab is divided into groups, and within each group is a range of commands available within that category.
Some tabs, such as Home and Insert, are found on the ribbon in all Office apps, though the specific commands in these tabs differ between apps.
Further along the ribbon, you’ll find tabs specific to the Office app you’re using. In Word, for example, one tab is called References and includes all the commands you need to add footnotes, endnotes, and quotations to your document. Excel has a Formulas tab so you can add automated calculations to your spreadsheet, and PowerPoint has tabs for Transitions and Animation to make your presentation visually appealing.
For the purposes of this article, we'll discuss how to use the ribbon in Microsoft Word. Since there are several different tabs and many different options under each one, we’ll walk you through the tabs you’ll likely use most often.
Get the ITPro daily newsletter
Sign up today and you will receive a free copy of our Future Focus 2025 report - the leading guidance on AI, cybersecurity and other IT challenges as per 700+ senior executives
Step 1: Use the Home tab to format text

The Home tab in Microsoft Word has all the basic commands for formatting text.
For example, you can change your text’s font, size, or colour from this tab. You can also underline it or put it in bold, italics, or strikethrough. You can do this by highlighting the text you want to change in your document and clicking the appropriate command.
There is also a list of preset styles that change multiple properties of the highlighted text simultaneously. You can, for example, apply a predefined Header style to all the headers in your document to give them a consistent style without having to manually change the font size and colour.
Step 2: Use the Insert tab to add page numbers or symbols to your document
The tab next to the Home tab in Word is titled Insert. It enables you to add various elements to your document.
For example, you can add page numbers by clicking on the Page Number menu option. A pop-up window will appear from which you can choose the placement of the numbers. There’s also a drop-down option called Format Page Numbers, which enables you to select other forms of numbering such as letters or Roman numerals.
If you want to type a symbol that isn’t on your computer’s keyboard, go to the Insert tab and click on the Advanced Symbol option. This will open a window where you can select from a wide range of symbols.
Step 3: Using the Layout tab
Another useful tab is the Layout tab, which offers many options to change the look and shape of your document. For example, the Columns command enables you to split highlighted text into multiple columns, which is useful if you’re creating a newsletter or a magazine.
You can also use the Orientation button to switch between portrait and landscape modes and the Size drop-down menu to change paper size. This is useful if you’re creating a document for an international audience, as US letter paper is different in dimension from the equivalent A4 paper size used outside the US.
Step 4 (optional): Customising the ribbon
Office gives you the freedom to customise your ribbon if you wish. You can change the order of tabs, rename tabs, and even add custom tabs with your icons of choice.
To open the Customise the Ribbon window in Windows, right-click on any empty space in the ribbon and click Customise the Ribbon. On a Mac, click on Word in the top left corner, select Preferences, then go to Ribbon & Toolbar.
In the Customise the Ribbon pop-up box, you’ll see a list of the tabs you currently have active. Here, you can drag tabs and commands to re-order them. You can also use the buttons at the bottom of the list to rename the selected tab and add custom tabs. If you create a custom tab, you can then select which commands you want to add to your new tab.
Step 5 (optional): Show or hide the ribbon
Sometimes, you may want to hide the ribbon to clear space. The easiest way to do this is to double-click on the name of the currently selected tab. The tab names will remain, but the options underneath them will disappear. Click on a tab again to open it back up.
There is also a Ribbon Display Options icon found in the lower right of the ribbon in Office 2021 and in the top right in Office 2013 through 2019. Click on this to choose whether you want the ribbon to always be shown or if you want to automatically hide the ribbon when you’re not using it.
Summary
Once you’ve mastered the Microsoft Office ribbon, you’ll find that working on documents, spreadsheets, and presentations is a much smoother experience. You may even be able to customise the ribbon to suit the particular needs of your work.
Claire is assistant features editor and writer at the Daily Mirror, covering everything from TV and celebrities to real life and general great yarns. Now based in Northern Ireland, she previously worked at the Sunday Mirror and Sunday People as well as enjoying a fun stint as a freelancer at Belfast Telegraph, IT Pro Portal, EIN Presswire, and Arab America.