15 top BBC micro:bit projects
Check out 15 of the best micro:bit projects to test your mettle and become a coding whizz

Raspberry Pi and micro:bit projects are the best place to start if you're looking to take your first tentative steps into the world of coding.
Since its release in 2012, the Raspberry Pi has grown to become highly popular among computer hobbyists and tech enthusiasts that want to learn more about the inner workings of both hardware and software.
RELATED RESOURCE

IT best practices for accelerating the journey to carbon neutrality
Considerations and pragmatic solutions for IT executives driving sustainable IT
The BBC’s own mini-computer - the micro:bit - is also a great way of getting kids into coding. It offers a great and easy way to create and construct projects that let their imaginations run riot.
Initially, the micro:bit came with a 16MHz ARM processor which was the basis of a myriad of project ideas, some of which are featured on the BBC's micro:bit website.
In 2020, the micro:bit had a major update that offered fans new hardware and features.
The micro:bit V2 is around four times faster than its predecessor, sporting a 64MHz 32-bit ARM Cortex-M4 processor with FPU and eight times the amount of RAM (128KB). It also comes with Bluetooth wires, motion and temperature sensors, as well as an onboard speaker and microphone.
As with the Raspberry Pi, the straightforwardness of the micro:bit makes it the perfect choice for novices. So, whether you want to build an automaton or design a game, the micro:bit is a great place to begin. We've listed a few of our favorite projects to help get you started.
Get the ITPro daily newsletter
Sign up today and you will receive a free copy of our Future Focus 2025 report - the leading guidance on AI, cybersecurity and other IT challenges as per 700+ senior executives
Getting started with micro:bit projects
Once you have plugged in a Micro-USB cable into the micro:bit, attached it to your computer, and seen the LEDs of the board lit up, you are good to go. For each of the projects, you can choose to follow the steps exactly, or adapt them to suit one of the other three programming supported by the micro:bit.
The programming language the micro:bit supports are:
- CodeKingdoms JavaScript: a graphical drag-and-drop interface and text-based interface, good for beginners
- Microsoft Block Editor: a graphical drag-and-drop editor
- Microsoft Touch Develop: a text-based language, which comes pre-installed with a library of micro:bit commands
- MicroPython: a robust, text-based editor used by professional software developers
You can find tutorials and information about each of these programming languages on the micro:bit site.
Micro:bit Nightlight
By micro:bit
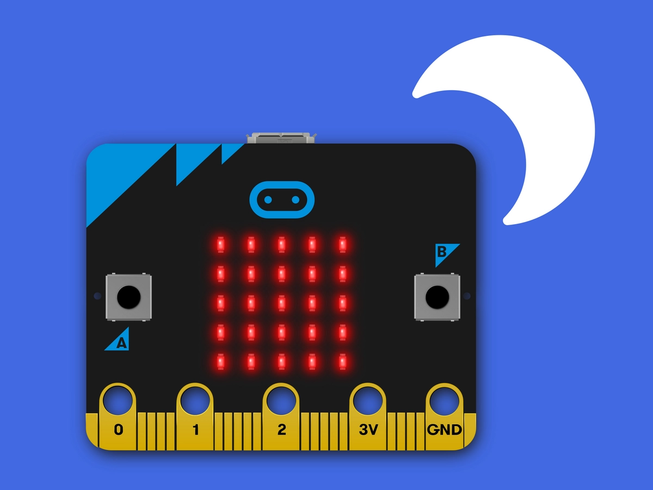
This is a nightlight that uses the micro:bit’s LED display to glow in the dark. As with the Sunlight sensor project, it also uses the micro:bit’s light sensor so that as it gets dark, the LEDs will switch on. The project allows users to alter the imaged displays by the small computer, or to simply produce flashing light.
This code can adjust the lights to come on when a certain threshold (I.e., less than (<) 100) has been reached. This threshold can also be adjusted to suit light conditions. The image can even be changed to show a star or a moon. The micro:bit can be used, when attached to a battery pack, as an additional safety light when walking or cycling.
Micro:bit Morse Code Machine
By John Goodman (M0RVJ)
This nifty project sees the BBC micro:bit become a Morse code machine, and was devised by John Goodman. Here he demonstrates what you can do when you have two of these devices, both connected to pair of short-wave transceivers.
One micro:bit can be used to send the dots and dashes using just a piezo buzzer. The other device is connected to a speaker. You can use the buttons on the device, or as Goodman demonstrates, pin 2 of the board can be used as a capacitive touch to send out signals.
The received code is stored as letters in the memory and once the message is received, it will show up on the device’s display.
This was coded in Micropython and Goodman has published the code on GitHub. Since the initial coding, Goodman has developed the code to boost the signal range enough to send signals within a larger area. There is also a menu that will display when you shake your micro:bit.
Micro:bit Radio communicator
By hackster.io
There is a 2.4GHz radio module, a Nordic Semiconductor nRF51822, built into every micro:bit, so this project takes advantage of that functionality to send and receive numbers. Thanks to this module, two devices can send signals to each other. You will need anther person with their micro:bit for this to work.
Once you have downloaded this program to both of the desired micro:bits, the "A" and “B” buttons can be clicked on to change the number you want to send to the other device. “A” will decrease the number by one, while the "B" button increases the value by one. Once you have settled on a value you want to send, click "A” and “B" simultaneously. The other device then receives that number within a few seconds.
While this is a great way to learn simple programs on the micro:bit, the project can also be used in other communication-based activities, such as developing your own numeric-based, coded language. In essence, the project is reminiscent of classic two-way radio, “walkie-talkie” games, but upgraded to include .hex or Java.
Micro:bit Compass North
By micro:bit
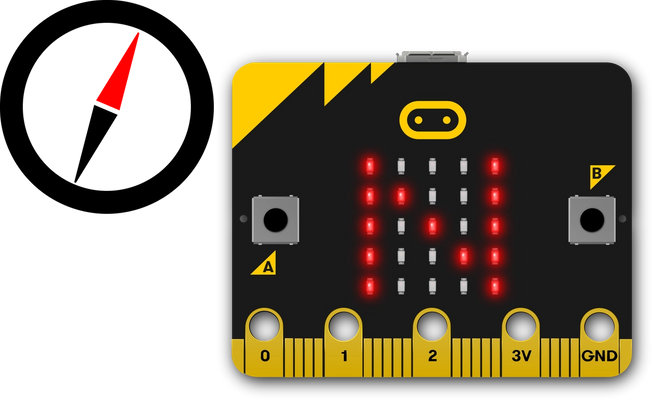
This project will always show you the way north. The micro:bit contains a magnetometer, more simply known as a compass sensor, which is used to measure magnetic fields. The first time it is used, it requires calibration, and this can be done easily by tilting the device until each LED is lit up. With this complete, your micro:bit is already good to go, and will now display the letter "N" on the LED display each time it is pointing in the direction of Earth's north magnetic pole.
Micro:bit Reaction game
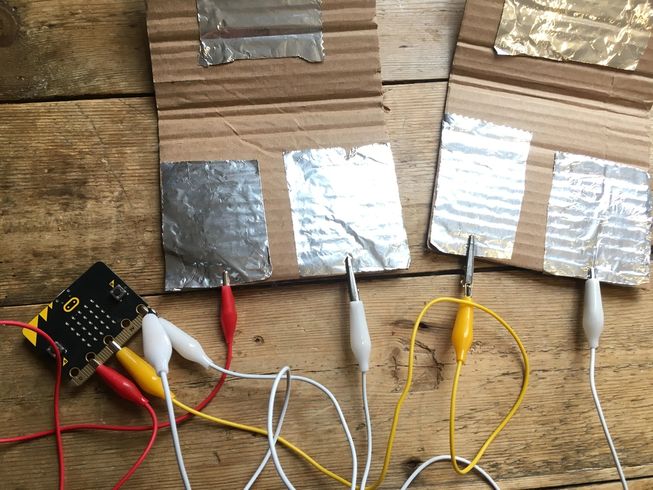
The micro:bit can be used to test your reflexes with a reaction game made with just cardboard, tin foil, and two micro:bit pins.
Start with two squares of cardboard and attach two smaller squares of tin foil to each. The micro:bit's GND pin connects to each pad of tin foil with the other ends connecting to pin 1, for player A and pin 2 for player B.
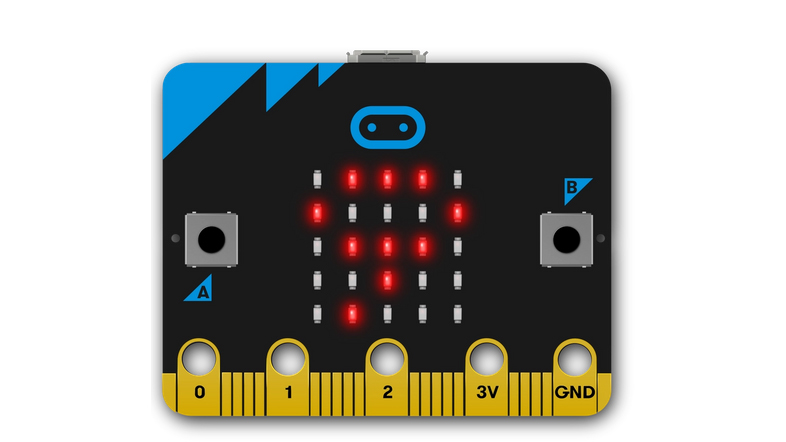
The program will show a 'heart' on the LED display at a random time between 1 and 5 seconds, and players are required to hit the pad as soon as it appears. The winner is the person that hits their tin foil pad first.
This is all done through Boolean logic, using a set of variables that are either set to True or False. The game works under an infinite loop to allow players to continue playing.
Micro:bit Flashing heart
By Microsoft Block
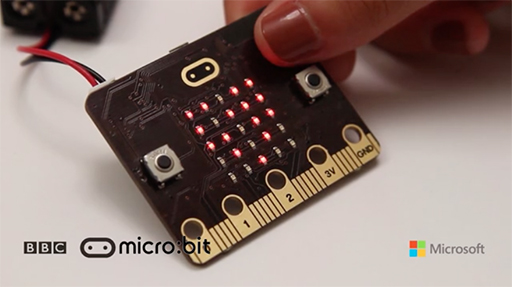
One of the simplest micro:bit projects to cut your teeth on is to make the device's LED grid form a flashing heart. You can create the code in the Microsoft Blocks graphical editor.
The BBC tutorial will guide you through how to do this, and once you've got your head around it, the same principles can be used to make other shapes.
Micro:bit countdown timer
By 101 Computing
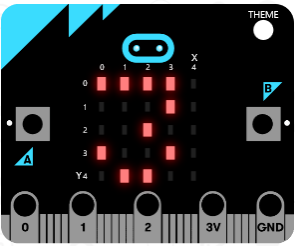
We can't think of many practical uses for a nine-second countdown timer — besides using it to trial 100-metre Olympic sprinters. However, 101 Computing's tutorial is a novel example of how LEDs can be used to display numerals.
Micro:bit Combination Lock
By BBC Make It Digital and Wolfblood
Combination Lock is an easy way to protect your stuff and even to warn you of burglaries. The project relies on using the micro:bit to detect whether a circuit is complete or broken.
By creating a circuit of copper tape and attaching a buzzer, your micro:bit will sound an alarm when the protected box, door, or drawer is opened. This tutorial walks you through setting up your very own lock and passcode.
Micro:bit Touch arpeggiator
By Technology Will Save Us
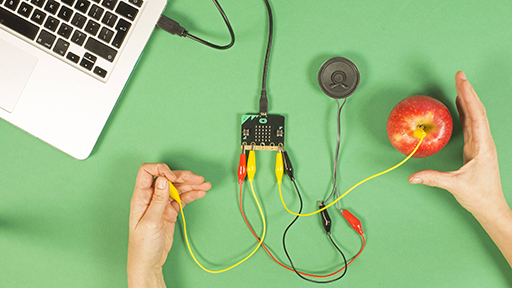
This is one of the most fun and relatively simple micro:bit projects so far. Inspired by 'banana keyboard' tutorials found online, it guides you through how to turn your micro Bit into a touch-activated tone generator.
All you need is an electronic buzzer, four wired crocodile clips, a micro-USB cable, and, your choice of fruit. Using this method, you could even play musical scales with more than one buzzer.
Micro:bit Step counter
By The Institute of Engineering and Technology
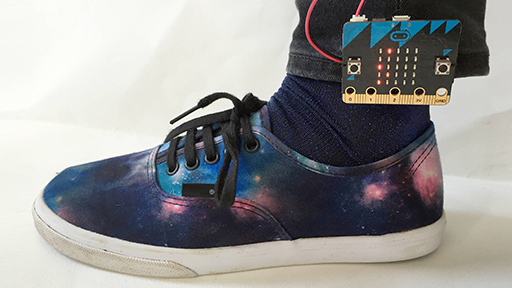
"I'm walking out the door with my micro:bit on my mind" is what you could be saying if you follow this exquisite, and more involved, guide on how to turn your micro:bit into a pedometer.
Following this project, you'll be able to create a working pedometer that could compete with commercial equivalents, and have fun while walking out and about. Tread carefully while it's on!
Micro:bit Electronic name tag
By Technology Will Save Us
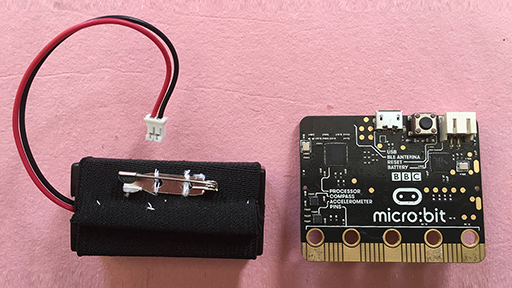
If you are a regular at technology conferences, or indeed any other conferences, then you’ll be familiar with having to wear a lanyard or name badge that allows you to hop between once talk or conference section to another.
But such tag can be rather dull, so why not add a little spice into yours with a personalized badge powered by the micro:bit.
To get started you’ll need a micro:bit Telec version, a AAA battery cage with two AAA batteries, and some proficiency with a needle and thread. You won’t need much else, as this is a rather entry-level project to get you familiar with coding on the micro:bit. With a little bit of practice, you can get the LEDs to display things like basic emojis.
Once set up, you should have a badge that’ll at least set you apart from other conference attendees, and might even see you end up networking with more success.
Micro:bit LED circuit game
By Intense Computer Training
This project, from Intense Computer Training, is actually a fair straightforward circuit game. Following the video tutorial (no text version is available at the time of publishing), you'll learn how to code the LED display so that individual LEDs can represent your counter on the five-by-five grid.
Micro:bit racing game
By 101 Computing
This project is a ridiculous slice of work-time fun that's just waiting to engage (or possibly disrupt) classrooms and lunch halls in Britain. Following this tutorial you'll turn the micro:bit's LED display into a drag racing game, playable by up to five players.
101 Computing guides you through creating the game and duplicating the code for additional players.
Micro:bit Temperature reader
By Proto-Pic
The micro:bit can also be turned into a pretty decent temperature reader. While it lacks a heat sensor, you can configure it to display the temperature of, say, a CPU, which is pretty handy for PC builders.
Things get even more interesting when you add a thermistor to the micro:bit, which can be dipped into food and drinks to record the temperature directly – though this requires some advanced coding and is only for the most dedicated micro:bit enthusiasts.
Micro:bit Irrigation system

When given the simple task of watering a classroom spider plant, a group of Canadian schoolchildren decided to use a micro:bit to build an irrigation system instead.
The Grade 7 students from St. Thomas the Apostle Catholic Elementary School in Hamilton, Ontario, had been studying the impacts of fertilizer use on the environment, as well as indoor farming technologies and hydroponics.
They were then given the opportunity to use their knowledge in combination with some basic programming skills, by building a system which would sense when the plant becomes dry and needs to be watered with the help of a programmed water pump.
Their teacher Rodenna Fallis told The Spec that group projects like this are beneficial in raising “critical thinkers, problem-solvers and thoughtful collaborators".
“My whole mission is to make them feel equipped in the digital world ... and how to be good stewards of the earth. This is exactly why I love teaching my kids coding, because they just feel like they’re a part of something bigger," she added.
Images in this article courtesy of the respective parties behind each project

Clare is the founder of Blue Cactus Digital, a digital marketing company that helps ethical and sustainability-focused businesses grow their customer base.
Prior to becoming a marketer, Clare was a journalist, working at a range of mobile device-focused outlets including Know Your Mobile before moving into freelance life.
As a freelance writer, she drew on her expertise in mobility to write features and guides for ITPro, as well as regularly writing news stories on a wide range of topics.
-
 Bigger salaries, more burnout: Is the CISO role in crisis?
In-depth CISOs are more stressed than ever before – but why is this and what can be done?
By Kate O'Flaherty Published
-
 Cheap cyber crime kits can be bought on the dark web for less than $25
News Research from NordVPN shows phishing kits are now widely available on the dark web and via messaging apps like Telegram, and are often selling for less than $25.
By Emma Woollacott Published
-
 AWS expands language support for Amazon Q Developer
News AWS has expanded support for languages in Amazon Q Developer, making it easier for developers to code in their first language.
By Nicole Kobie Published
-
 AI was a harbinger of doom for low-code solutions, but peaceful coexistence is possible – developers still love the time savings and simplicity despite the allure of popular AI coding tools
News The impact of AI coding tools on the low-code market hasn't been quite as disastrous as predicted
By Ross Kelly Published
-
 ‘We’re trading deep understanding for quick fixes’: Junior software developers lack coding skills because of an overreliance on AI tools – and it could spell trouble for the future of development
News Junior software developers may lack coding skills because of an overreliance on AI tools, industry experts suggest.
By George Fitzmaurice Published
-
 GitHub's new 'Agent Mode' feature lets AI take the reins for developers
News GitHub has unveiled the launch of 'Agent Mode' - a new agentic AI feature aimed at automating developer activities.
By Ross Kelly Published
-
 Shadow AI is creeping its way into software development – more than half of developers admit to using unauthorized AI tools at work, and it’s putting companies at risk
News Enterprises need to create smart AI usage policies that balance the benefits and risks
By Solomon Klappholz Published
-
 Python just brushed past JavaScript to become the most popular programming language on GitHub – and a key factor is that AI developers love it
News The meteoric rise of Python shows no sign of stopping
By Nicole Kobie Published
-
 Tiny11 review: Windows 11 with only 2GB of RAM
Review A version of Windows 11 for older machines that don't meet the full requirements
By Nik Rawlinson Published
-
 Red Hat Enterprise Linux becomes foundational operating system for Cohesity Data Cloud
News New strategic partnership between Red Hat and Cohesity aims to drive innovation in the data security and management space
By Daniel Todd Published