How to build a CMS with React and Google Sheets
Rolling your own CMS tool can be a great way to meet your needs - and it's surprisingly easy to do

Launching a website can feel like a landmark moment. It’s the digital age equivalent of hanging an ‘Open For Business’ sign in your window. If your proverbial sign is static and rarely requires updates - for example, if it’s simply intended to communicate basic operating practices like opening hours, contact information and a list of services - then you can likely build a simple site in HTML and CSS, and wrap the project there. But for most businesses, something far more dynamic is required.
As the term implies, a Content Management System, or CMS, is a structure that enables users to model, edit, create and update content on a website without having to hard-code it into the site itself. Many businesses use off-the-shelf CMS tools like WordPress, Joomla, Magento or Squarespace to handle this function.
When it comes to pin-pointing the factors that really make a really good CMS stand out, the most successful out-of-the-box solutions share one common trait - they’re easy to interpret. For any CMS, its success as a product completely relies on how easy it is for teams to create, manage and update logical data structures. The more pain-free this process is, the easier it becomes for teams to create robust content models. That being said, as any engineer will tell you, the implementation of relational databases is in itself its own art form.
The problem with these out-of-the-box solutions is that they can often include far too many features, cater to completely different levels of tech literacy, and what’s more, can make it far too easy for you to rack up an expensive bill. An alternative option is to build your own custom CMS that’s designed to meet your specific requirements.
While building the thing that you need is often viewed as the scenic route to solving your problem, when tackled the right way, it can turn out to be the quickest solution. An excellent way of streamlining a project with the potential for infinite scope-creep, while putting any information that’s lying dormant in a spreadsheet to good use, is to use Google Sheets as the foundation for your CMS.
Despite the best efforts of AirTable, Notion and even Smartsheets, there’s a reason why spreadsheets have stood the test of time as a widely accepted file format. Chances are, no matter the skill level or aversion to technology, most people within a business are going to know how to navigate their way around a spreadsheet.
In the following tutorial, you'll see how using popular JavaScript tools including the Node.js framework and React library, you can stand up a dynamic web application built right on top of Google Sheets. We’ll create a Node project to act as a container for our API queries, and then harness React to parse our data, which will then be presented and served to the user via a dynamic front-end. Here we’ll be taking advantage of React’s tendency to abstract away a lot of the internal complexities of our application’s inner workings, along with its reusable components. The latter feature is perfect if you’re building out a broad website with a multitude of pages that you’d like to all have a consistent look and feel.
Get the ITPro daily newsletter
Sign up today and you will receive a free copy of our Future Focus 2025 report - the leading guidance on AI, cybersecurity and other IT challenges as per 700+ senior executives
For this example, we’ll be using the ‘Meet the Team’ page for a fictional technology enterprise business. If you’d like to use the example data we’re using for the purposes of this demonstration, you’ll find the spreadsheet linked below.
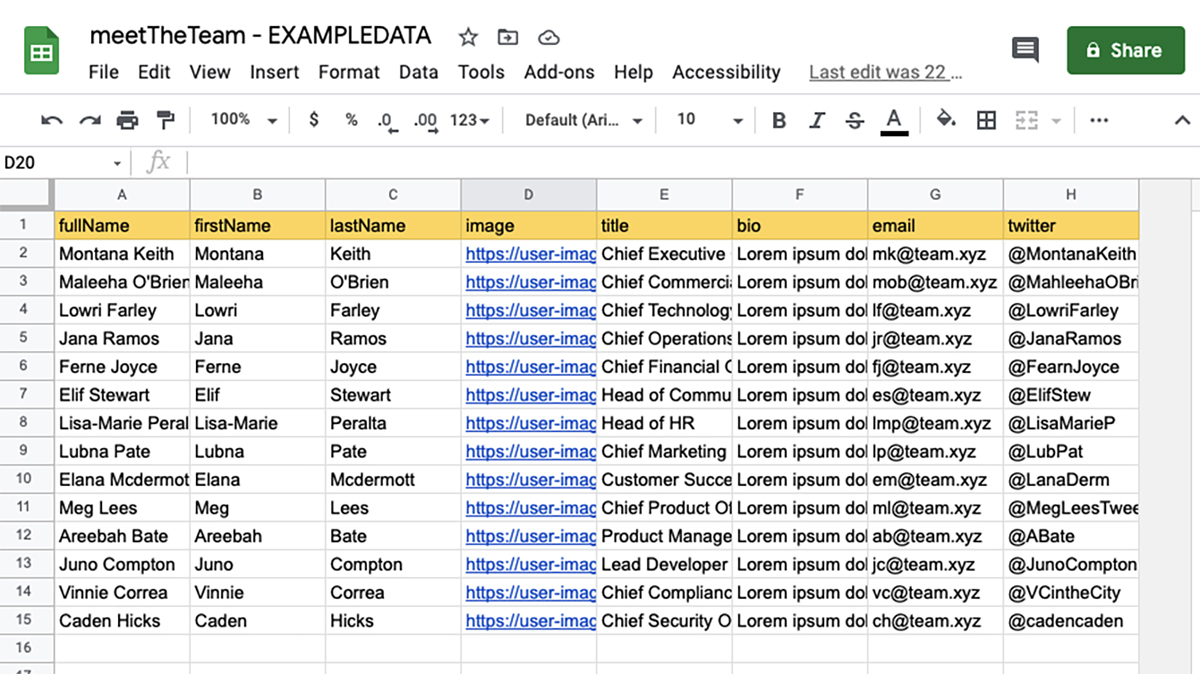
What you’re essentially going to do is access your spreadsheet as an API, querying it in order to pull out the content for your front-end React page. We’ll be accessing the data from the sheet in JSON format, and then using the dotenv package in order to store the credentials needed to access the information from our Node project. This will parse the information and feed it through to the front-end, presenting it in a far more polished and stylised format.
First up, let’s use the terminal to generate a new project from which we’ll be working from. Create a new directory for your project by running ‘mkdir’ followed by your project name, and then step into that directory using the ‘cd’ command. To create our Node project we’ll firstly run ‘$ npm init -y’ from the terminal, before creating two additional files we need to get up and running, using the ‘touch’ command.
One of these is our .env file which will contain any sensitive keys, credentials or variable settings we’ll need in order to access our Sheet. Remember to keep this section in your .gitignore if you decide to share your repository publicly to prevent your keys from being deactivated and your credentials from being stolen. The last step, as illustrated in the code snippet below, is to install a few external packages we’ll be using in our project. We’ve covered off dotenv, and the googlesheetsapi is no surprise. The final one is Express, which we’ll be using as our Node.js framework due to its lightweight nature and its ability to quickly spin up servers.
| $ mkdir project-name$ cd project-name$ npm init -y$ touch index.js .env$ npm i express google-spreadsheet dotenv |
Once you’ve installed your external packages, open up your node project in your preferred text editor and initialise your server using the below code snippet:
| require("dotenv").config()const { GoogleSpreadsheet } = require ("google-spreadsheet")const { OAuth2Client } = require('google-auth-library');const express = require("express")() // process.env global var is injected by Node at runtime// Represents the state of the sys environmentconst p = process.env // Set up GET route in Expressexpress.get('/api/team/', async (request, response) => { response.send("hello world")}) // Express listener, on port specified in .env fileexpress.listen(p.PORT, () => console.log(`Express Server currently running on port ${p.PORT}`)) |
Here, we’re essentially calling the packages which allow us to access the spreadsheets object, and on line six, we’re setting a variable of ‘p’ that creates a shortcut to process.env. Essentially, this will represent the state of our system environment for the application as it starts running. By adding a shortcut, we’ll be able to effectively access the spreadsheets object with far less effort.
The rest of the program is initialising our express GET route (a.k.a. how we’ll be querying our sheet) and setting up a listen function in place to assist with our build. This will give us a handy prompt as to which port the express server is running on while we’re working to connect our React front-end to the application.
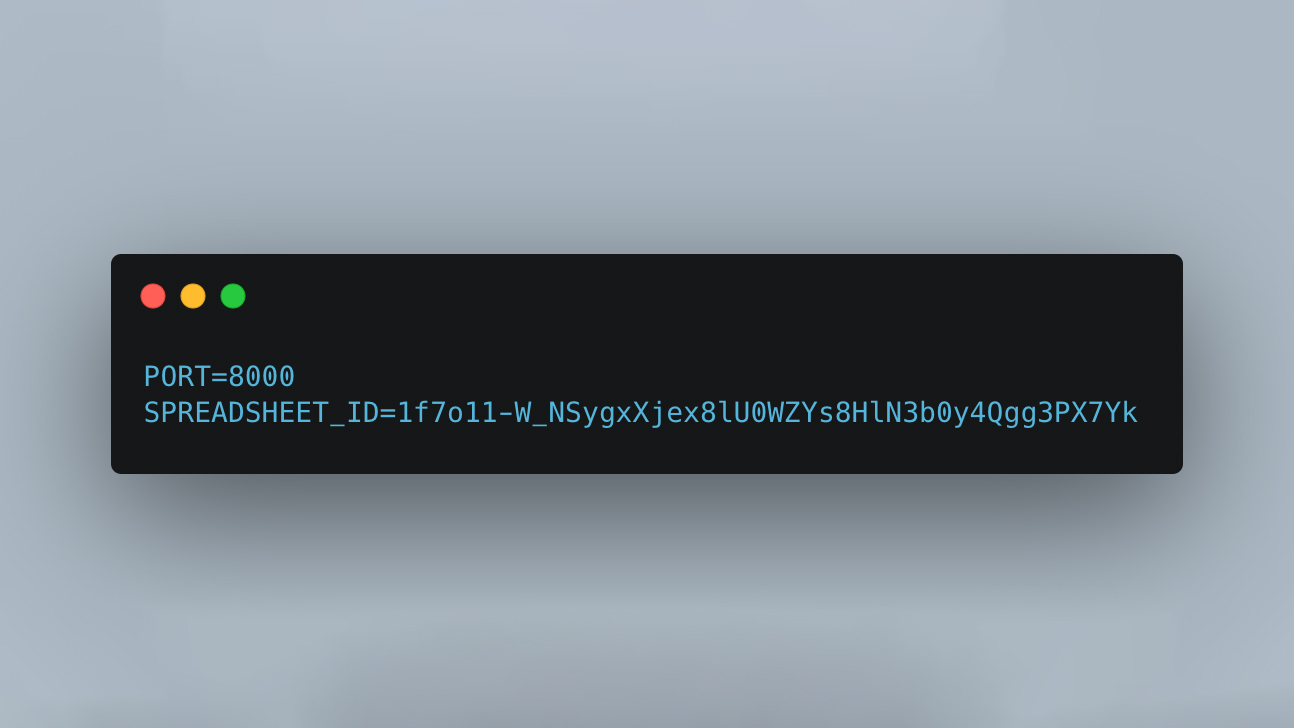
Lastly, head into your .env file and assign your port number as per below in plain text, “PORT=8000” and hit save.
Run node index.js from the root in your terminal, and you should see the listen console.log message appear stating which port your server’s currently running on - in this case, it’s port 8000.
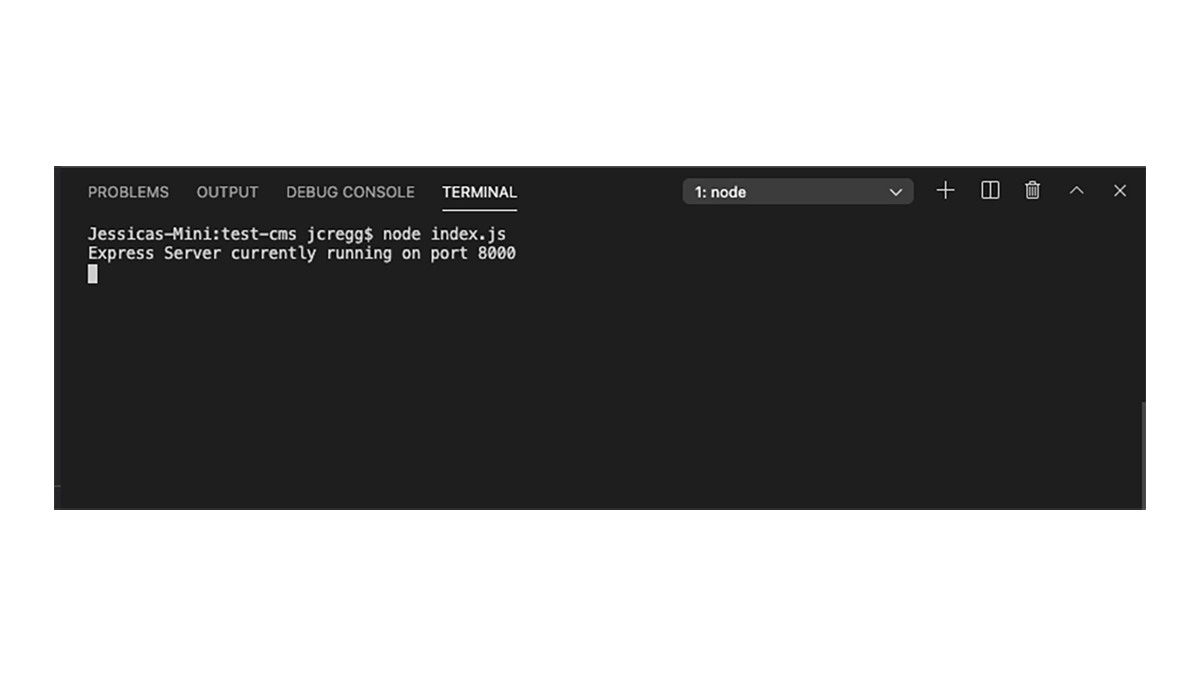
If you head to your browser and access the port that your application is running on, you’ll notice that your GET method is failing. Let’s fix that.
At the moment, we’ve got our method for querying our data established. We now need to get the data flowing through our server. The next step here is to assemble your Google Spreadsheet with both the headings and the content you’d like your node project and React app to pull through. If you’d like to follow along, feel free to make a copy of the ‘Meet the Team’ spreadsheet we’ve created.
The first thing you’re going to need to lift is your SPREADSHEET_ID. You can find this by copying the long string (or slug) found in the URL following the /d/. For example, in this case, our slug is “1f7o11-W_NSygxXjex8lU0WZYs8HlN3b0y4Qgg3PX7Yk”. Once you’ve grabbed this string, include it in your .env file under SPREADSHEET_ID. At this stage, your .env file should look a little something like this:
Next, head to the Google Sheets Node.js Quickstart page to enable the Google Sheets API. You’ll need to click the blue ‘Enable’ button before naming your project, selecting ‘Web Server’ and entering your localhost URL when configuring the 0auth values.
If executed correctly, this step will have enabled the Google Sheets API from your Google Cloud Platform (GCP) account. To confirm that’s happened, simply head over to your GCP console and you’ll spot your project in your profile page.
To authenticate this exchange of data, we’ll need to generate an API key. This will authorise your app to access your Google Drive, identify your Spreadsheet via the SPREADSHEET_ID, and then perform a GET request to retrieve the data to be parsed and displayed on your React front-end.
To get hold of your API key, you’ll want to navigate to the credentials section of the GCP console, click blue "+ CREATE CREDENTIALS" and select the "API key" option.
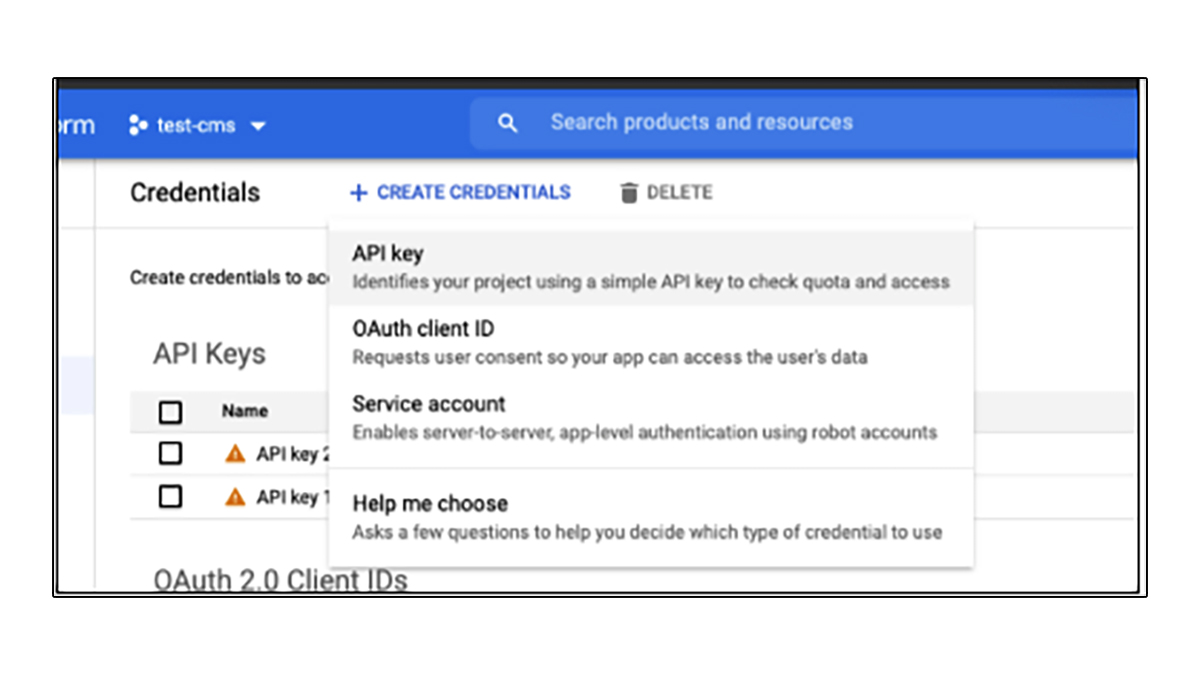
Once your key’s been generated, copy it and add it into your .env file under API_KEY.
Perfect! Now let’s initialise and use the key within our code to authenticate our Google Sheets query. In the snippet below, you’ll notice that we’re using the await operator to coincide with the async function initiated at the beginning of the index.js program shown earlier in this tutorial. To view the complete code as a reference, you can head here to review and even clone the repository.
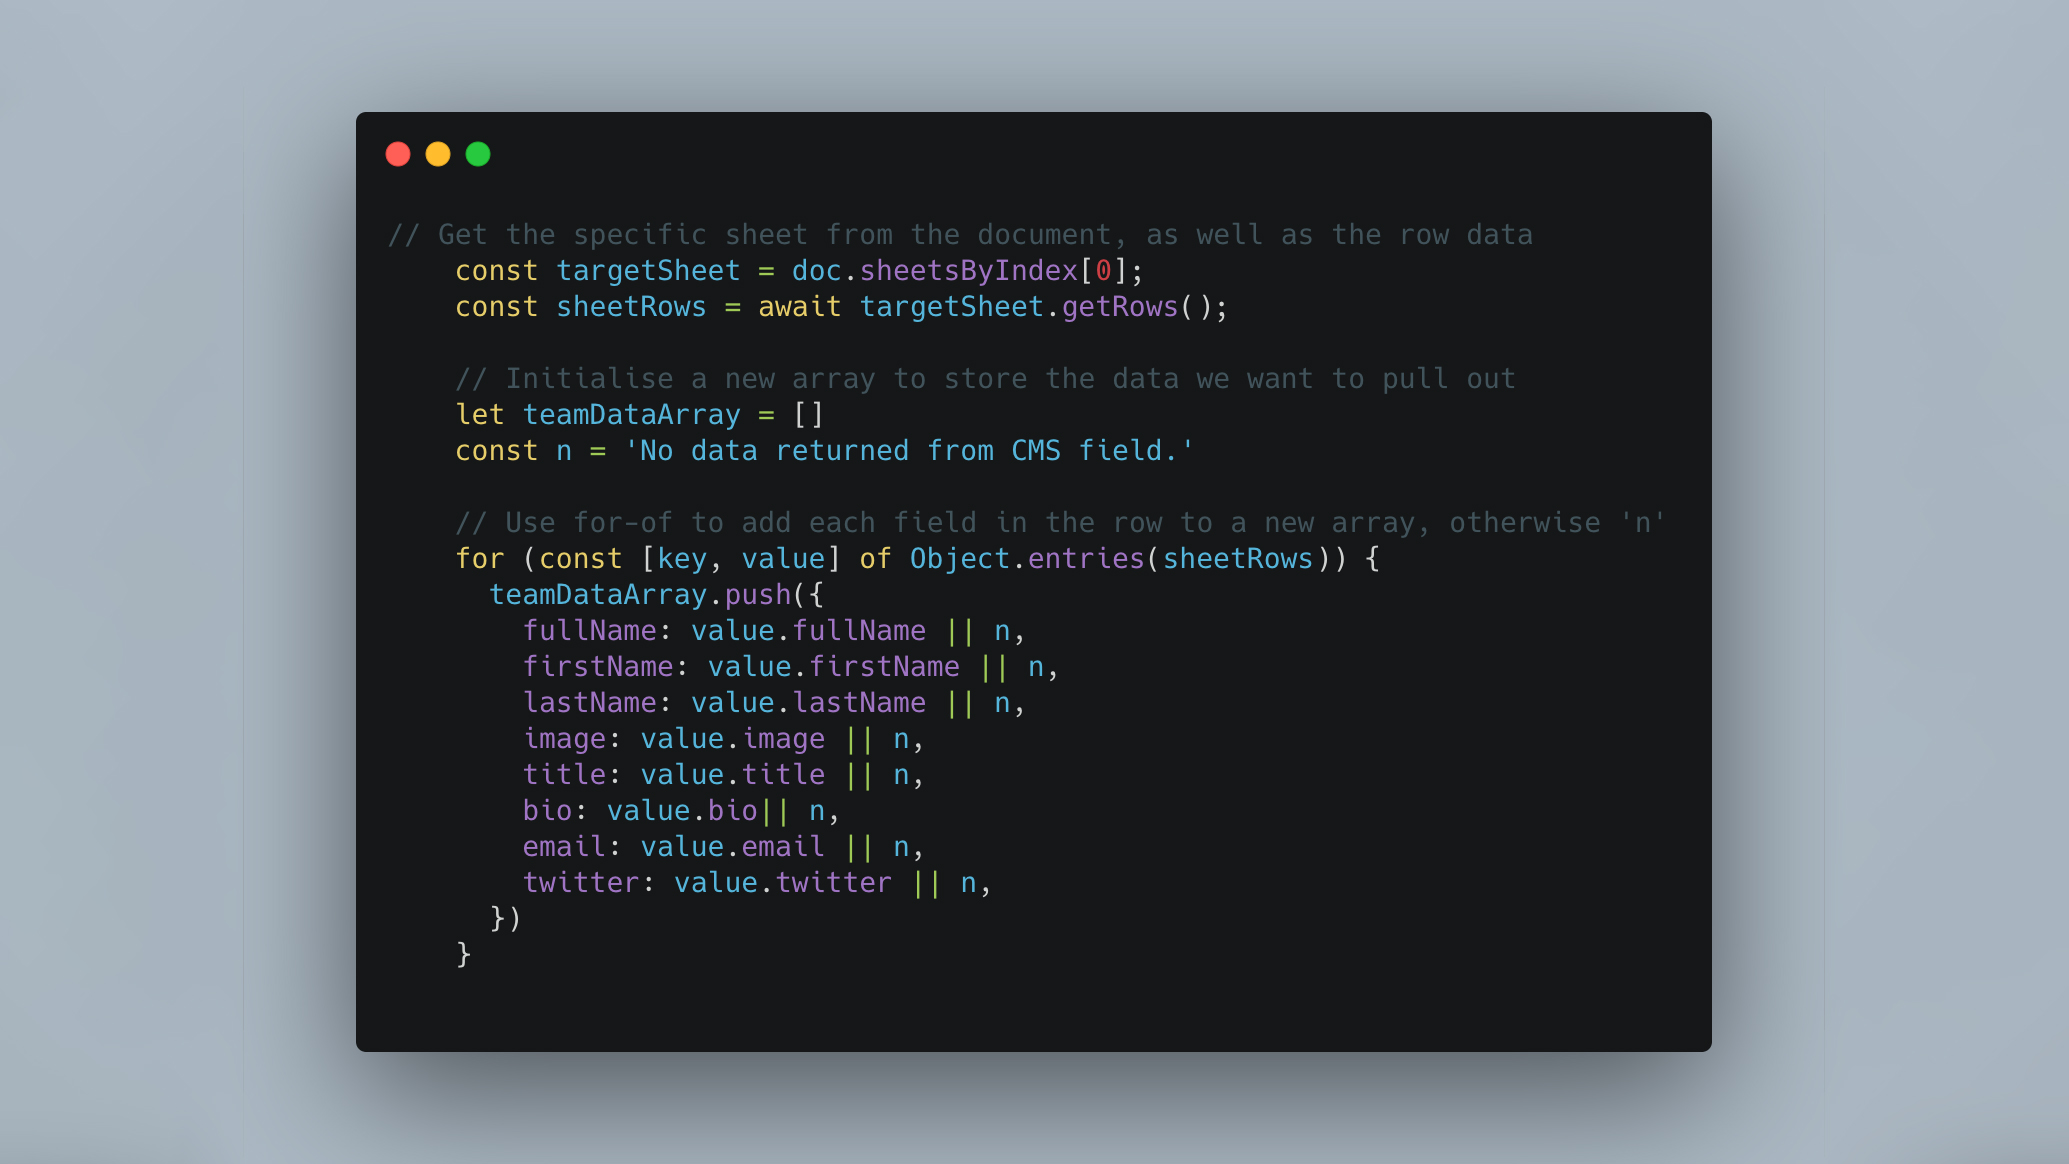
Now we’ve authorised our sheets object, it’s time to minify the data. This is a process by which we remove any unnecessary, superfluous data from the JSON object, so that we’re left with only the most vital sections of the object which we’ll model within our React front-end.
Head to the index.js file of the linked repository and you’ll see how we’ve been able to do this. We start off with an empty array, and then we iterate through the rows in the sheet assigning a key corresponding to the column header, and match the value to that of the cell data for that particular row.
If you’re familiar with React, then you’ve more than likely used the package create-react-app which is by far one of Facebook’s greatest gifts to the world of application development. With one command, you’re able to spin up an instance giving you the file structure and most of what you need to get going out of the box.
The ‘create-react-app’ command generates a locally hosted, single-page React application that requires no configuration in order to get going. When you run the command, create-react-app will run local checks on your target directory, builds your package.json, creates your dependency list and forms the structure of your bundled JS files.
Let’s kick off this process by running the following at the root of our application:
| $ npx create-react-app client$ cd client$ npm start |
If you run into any problems with the version of npm/npx that you’re running, then the below modified command with an added bit of cache clearance should steer you right:
| $ npm uninstall -g create-react-app && npm i -g npm@latest && sudo npm cache clean -f && npx create-react-app client |
If your command has run successfully, you’ll start to see create-react-app install its required packaged and build out the below file structure.
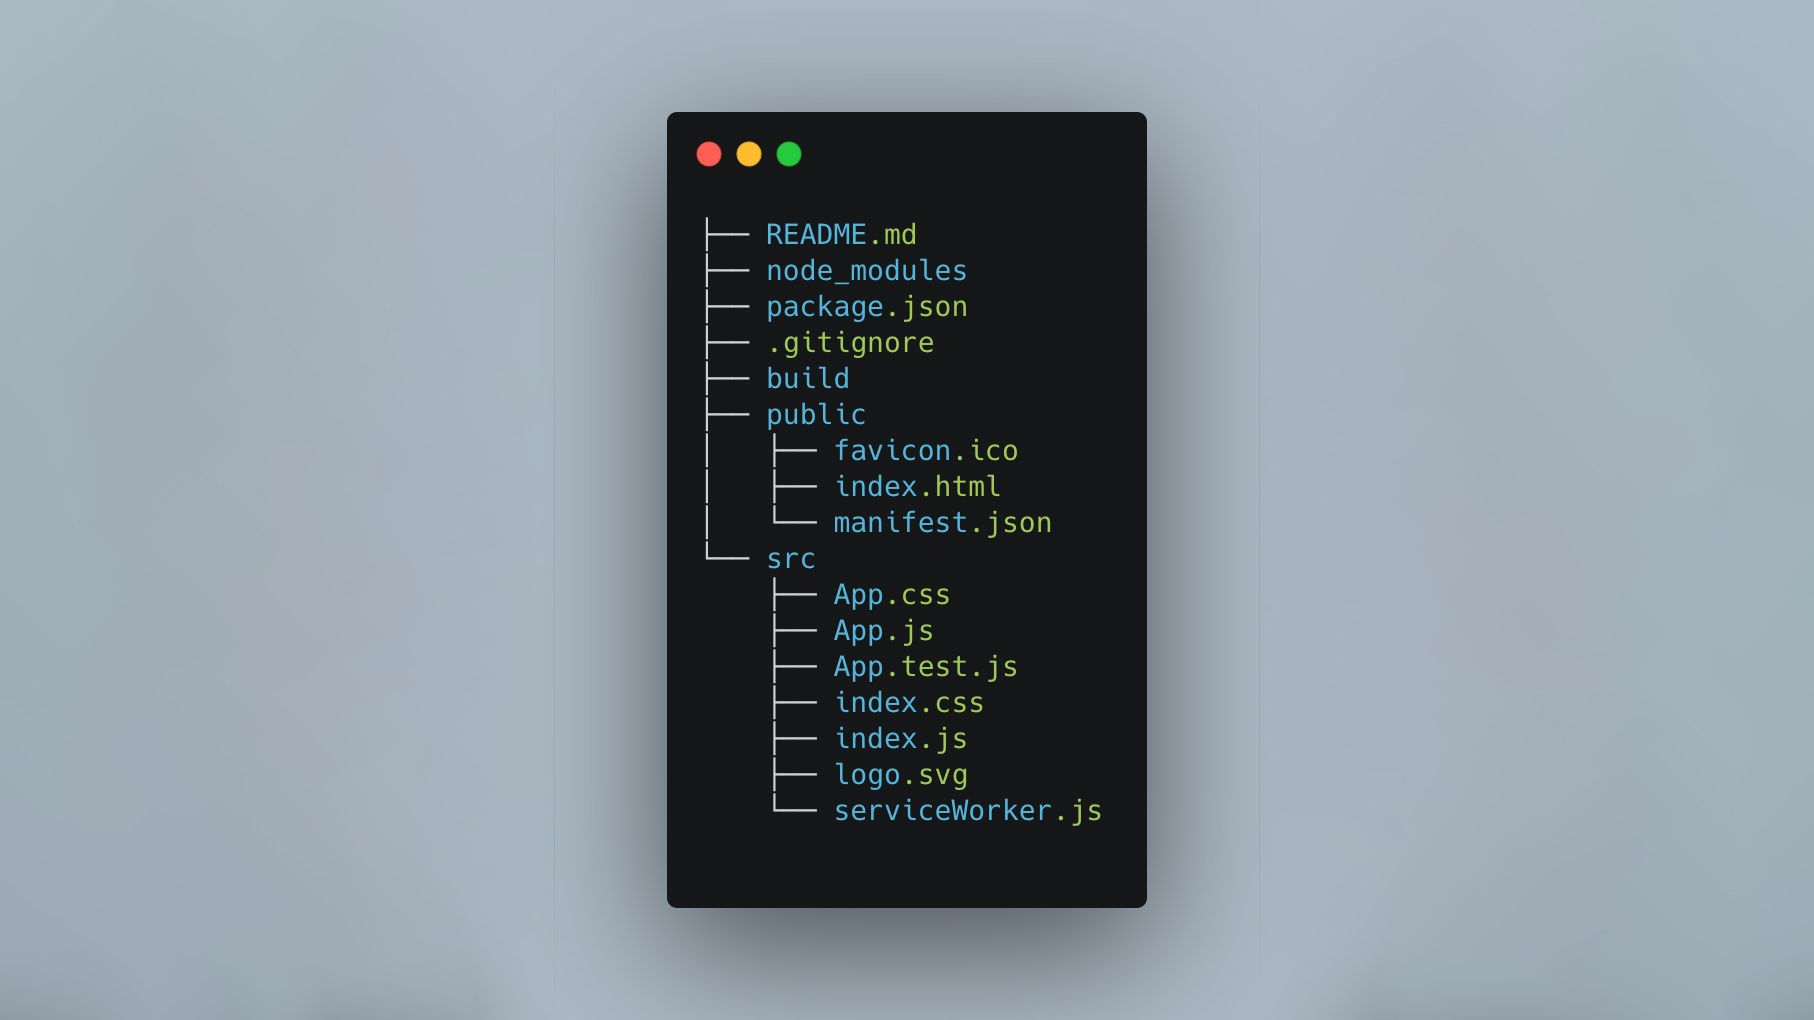
Lastly, you’ll notice that your application now has two package.json files. We’ll need to make an edit to the scripts section in the root, and then add one line below the ‘private’ section of your client directory. This is so that you can fire everything up with one simple command - the eternal saviour that is npm start.
In your root:
| "start": "node index.js -ignore './client' " |
And in your client:
| "proxy": "http://localhost:8000" |
Now with one run of npm start you’ll be met with your React front-end pulling through information from your Google Sheets CMS.
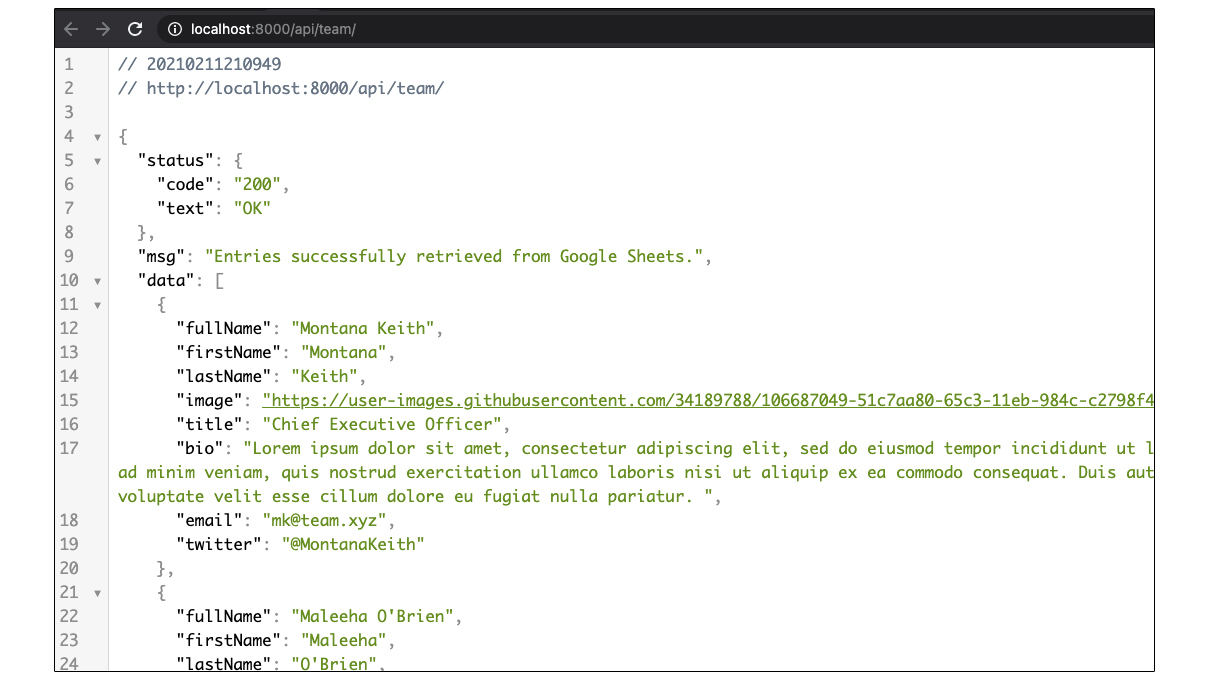
If you check out the back-end server (running on port 8000) in your browser, you’ll be met with a JSON object displaying your CMS data in its raw, unformatted form.
But, more importantly for the many stakeholders eager to access your newly-built site, here’s what you’ll see displayed on the front-end.

What was once entries on a spreadsheet, is now a fully-formatted, somewhat shiny React web app, ready to be deployed through your favourite hosting service. The great thing about this solution is that it can be incorporated into your wider React-based application, and styled using one of many free themes and templates out there, meaning that your final output can actually scale with you. There you have it - yet another reason to love spreadsheets.