Windows 11 tips and tricks for IT professionals
Like many systems, Windows 11 has a slate of hidden tips and tricks for users looking to ramp up productivity


Windows 11, like many operating systems of the present and past, has a habit of hiding the good stuff. When it comes to productivity, it’s often easier to search the web for something you assume must exist, rather than it being a matter of the user interface (UI) organically pointing you in the direction of said feature.
Many businesses, and professionals alike, will be mulling over whether it's worth upgrading to Windows 11. Alongside a swathe of exciting features that have arrived with Windows 11, what might push users over the edge are a handful of useful tips and tricks that may be slightly difficult to stumble on, but that can ramp up your productivity if you successfully tap into them.
Custom snapshots
There are multiple ways to take a snapshot in Windows 11, but perhaps the most versatile is the snipping tool. Rather than using the 'Print Screen' button, which takes an image of the entire screen and requires pasting into another programme, click Windows + Shift + S.
Your screen will darken and four options will appear, all denoting a different way to select the image you want to capture. Once you decide between rectangle, freeform, window, or full screen, you can then select what you’d like to capture and save it through the snipping tool window that will open once you click on the notification on the right-hand side of your screen.
Know your keyboard shortcuts
There are hundreds of keyboard shortcuts embedded into Windows 11, and while you could go full productivity guru and have an entire keyboard dedicated to Windows 11 macros – like some video editors – it’s perhaps more practical to memorise the ones you use most often.
For many professionals, that means using combinations like Windows + the number that corresponds to the order of the shortcuts in your taskbar. Some of the most useful include pressing Windows + I to open your settings, and Windows + U to open accessibility options. Here’s a more complete list of shortcuts as curated by Microsoft itself.
Turn on window shake
We could make a joke about hiding what you’re doing from shoulder surfers, but this window shake trick will be really useful in letting you focus on just one window at a time, minimising everything else on your screen.
Get the ITPro daily newsletter
Sign up today and you will receive a free copy of our Future Focus 2025 report - the leading guidance on AI, cybersecurity and other IT challenges as per 700+ senior executives
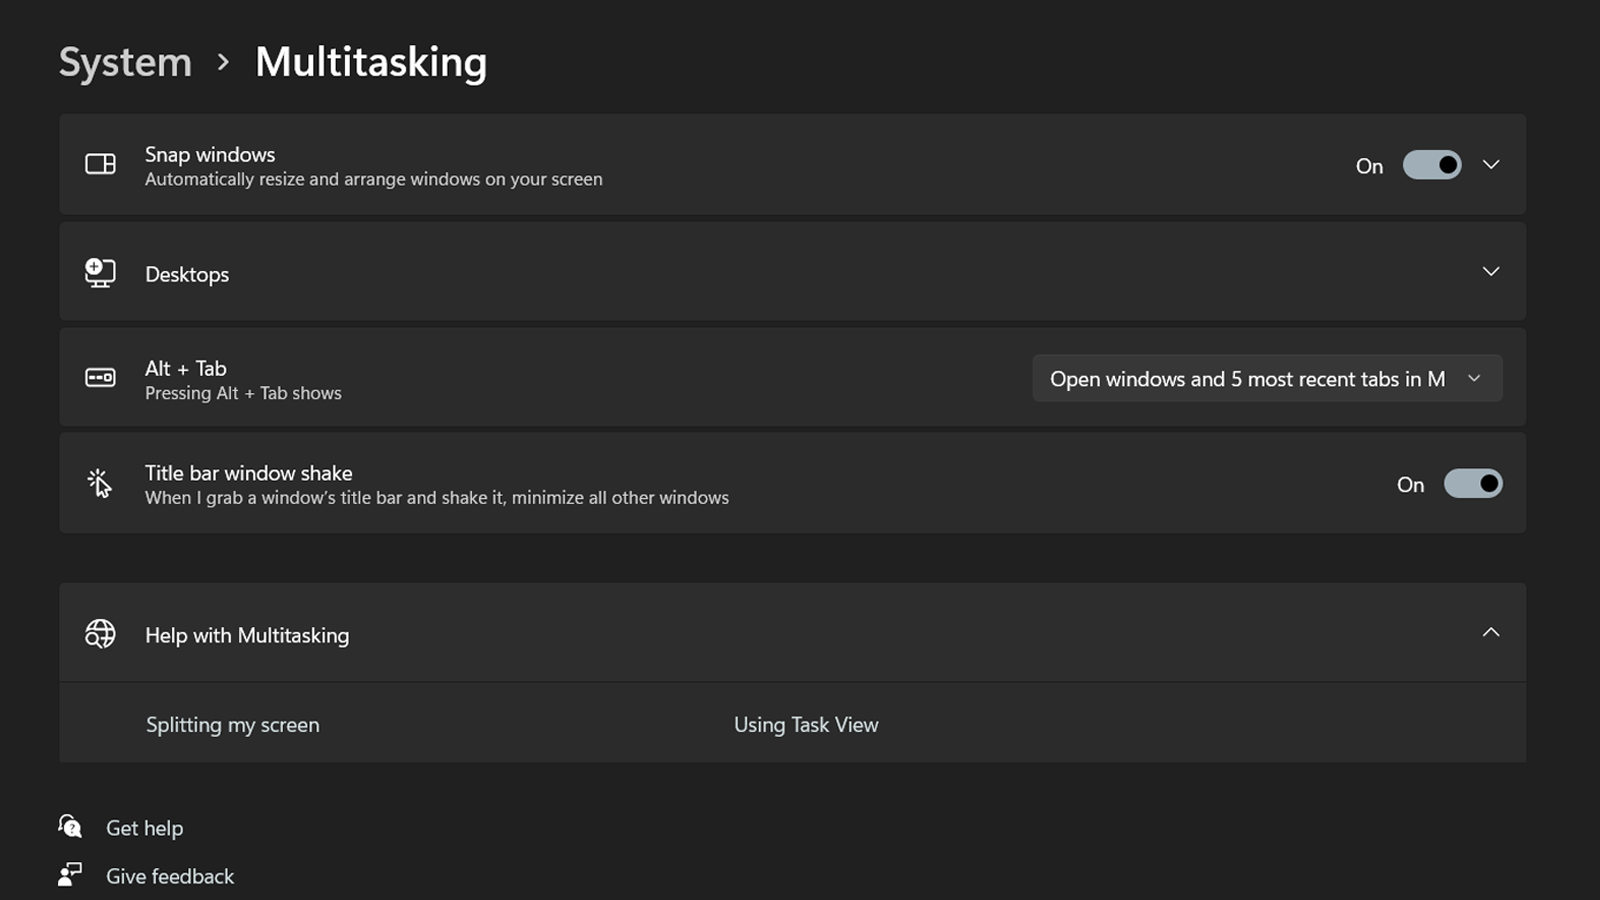
While you can set all of the items on your screen to skedaddle by using Windows + M, activating the window shake function allows you to move a window back and forth to make it the only thing on your screen. Although this setting isn’t enabled by default, you can enable it by opening Settings, scrolling down on the right-hand side to the multitasking area, and toggling window shake to on.
Customise your quick settings
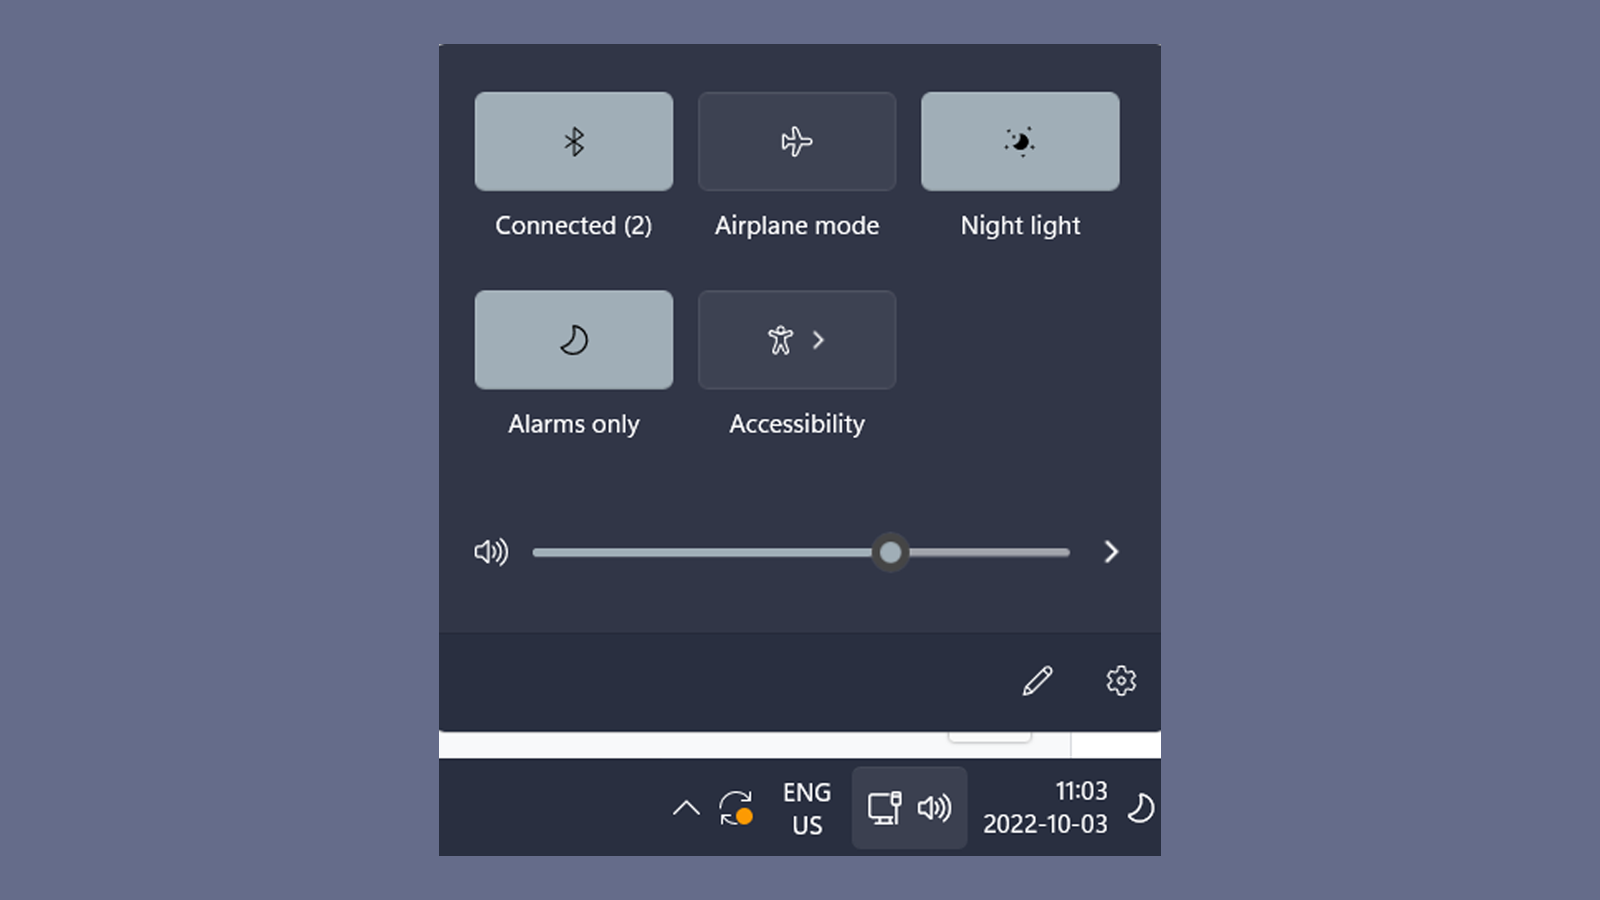
We all have those tools that we return to again and again. For many, they might be Network settings, Bluetooth devices, Focus mode indicator, and Audio settings. To look at this handy menu, click on the bottom right-hand of your screen, next to the date and time.
From there, you can add different options, including Airplane mode and Keyboard inputs. You can also go straight from this smaller menu to the broader settings area by clicking the corresponding gear icon.
Rename your audio sources
It may seem simple, but actually knowing which audio source you’re plugged into, rather than the generic name of your monitor or headphones, can really help shifting from deep quiet work to a broader presentation.
There are, after all, many times when you might be using multiple audio sources over the course of the day – such as your laptop, headphones, external monitor, and bluetooth speakers – which might cause confusion when logging into, say, a video conferencing meeting and encountering audio issues. First, go to Settings, then Sound, before selecting the little arrow next to the device you want to change.
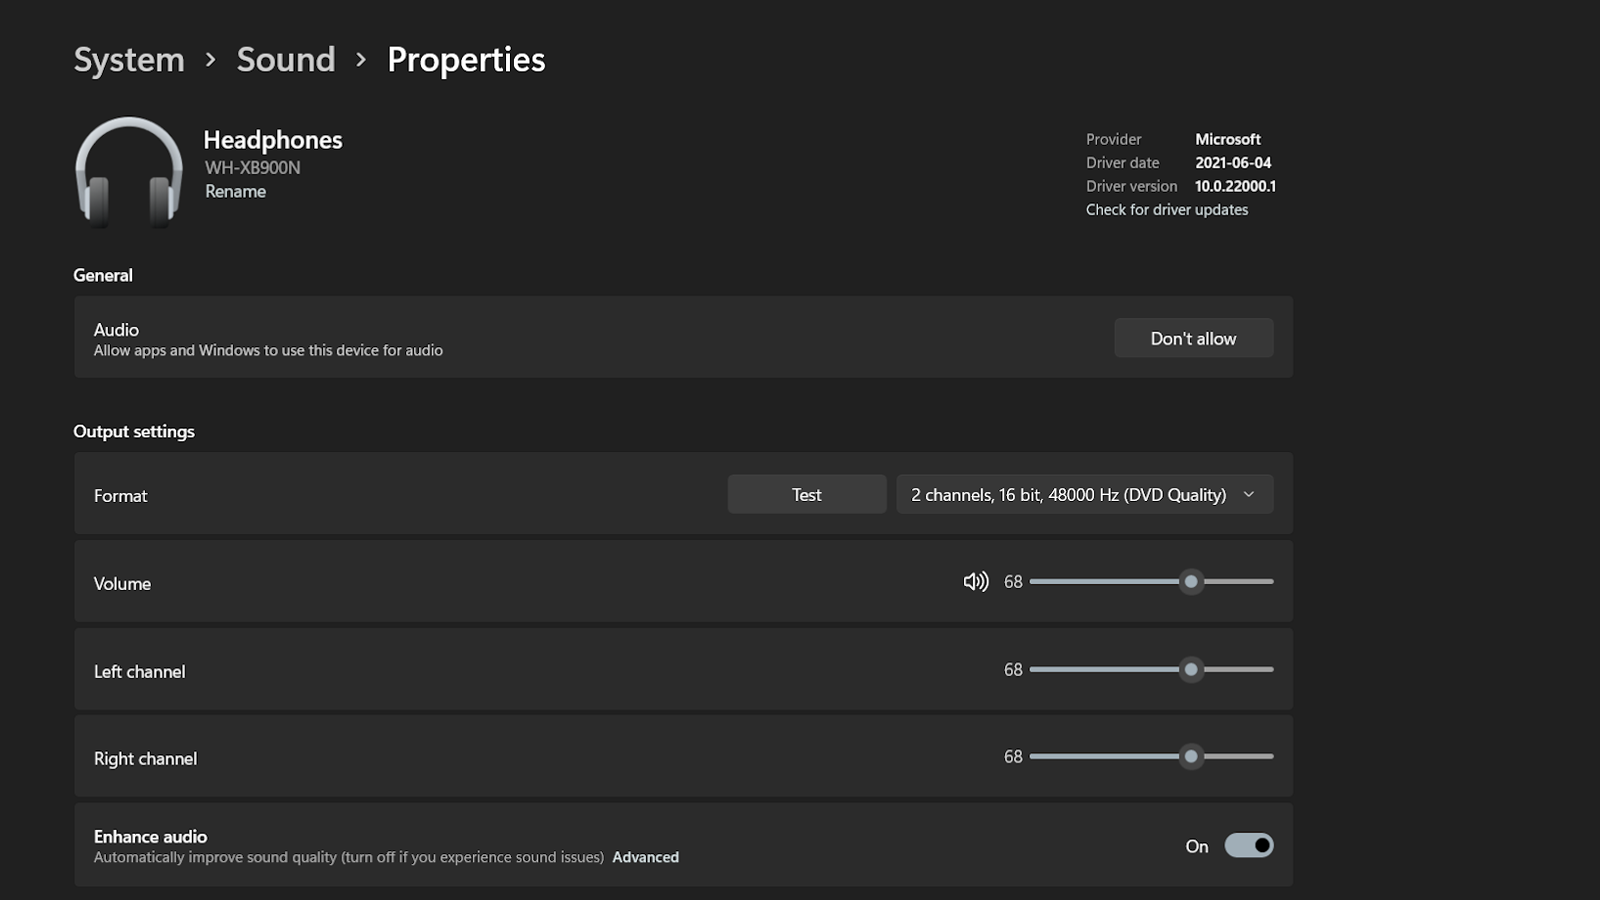
There are multiple options here, from changing the quality of audio you’re sending to your headphones to enabling spatial sound, but renaming your device is as simple as clicking the Rename button just below your device icon.
Voice typing
Microsoft isn’t a stranger to voice recognition technology. For one, it acquired Nuance – the makers of the Dragon Naturally Speaking software – in 2021. Voice typing, which was once known as dictation, can be used as both an accessibility tool as well as a way to speed up your workflow.
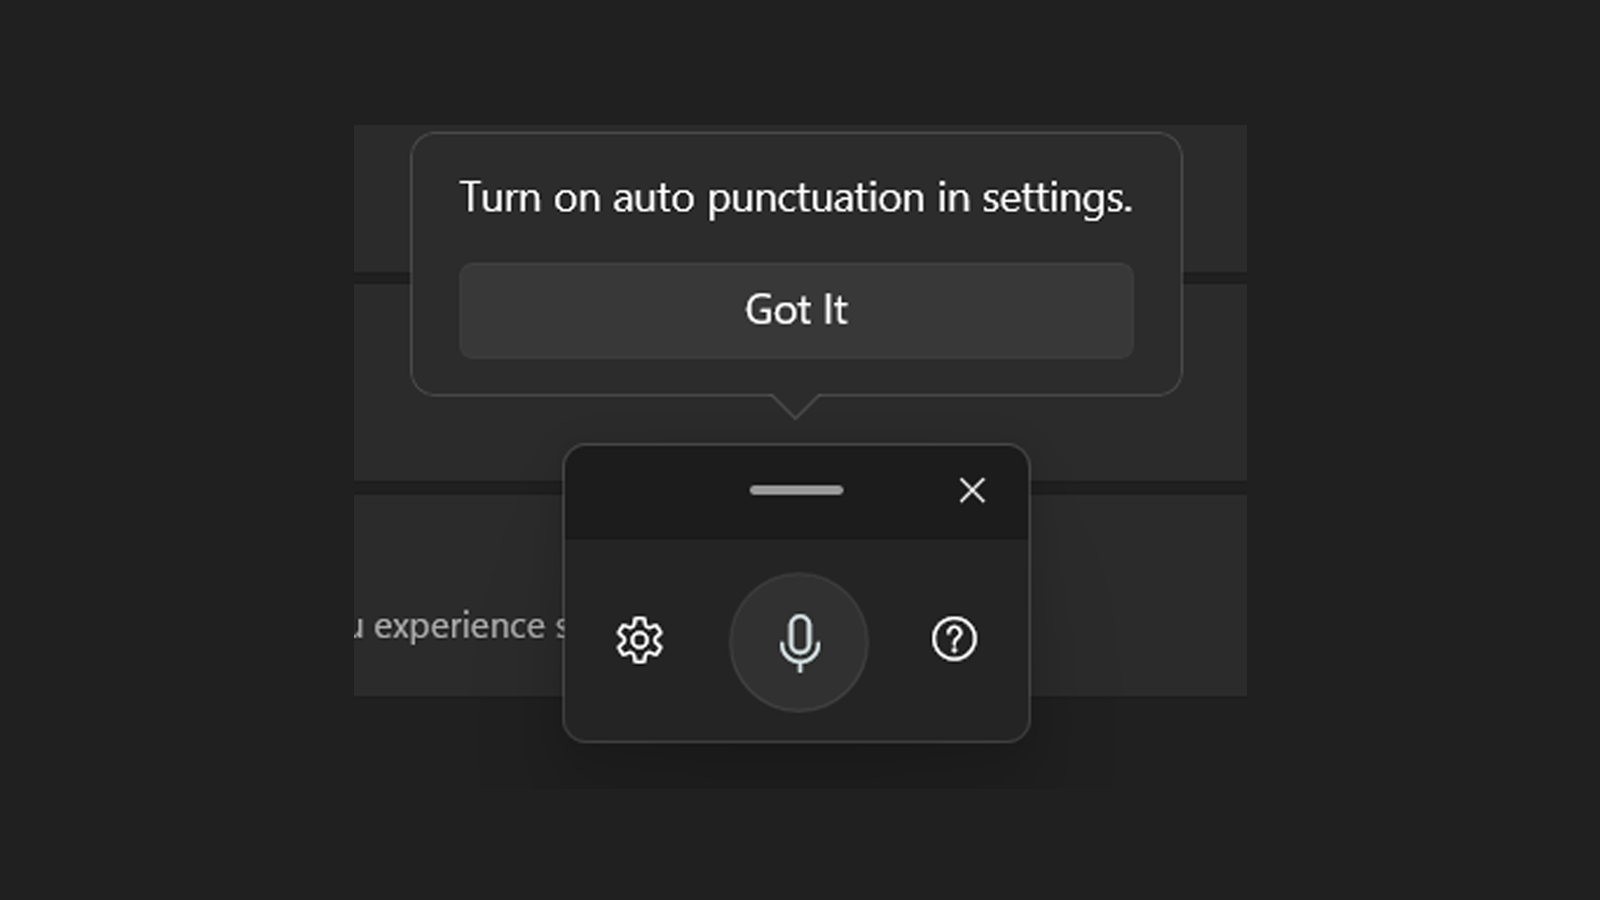
To activate voice typing, press Windows + H and then click on the little mic icon in the window that appears. You will hear a small bleep to indicate the programme is listening. Privacy-wise, you can choose whether or not to send voice clips to the window and you can also choose whether the software automatically provides punctuation for you.
Expanding the Start menu
Sometimes referred to as ‘the secret Start Menu’, if you right click on the Windows icon, a simple menu will appear that allows you to do things like go straight to your power options, open PowerShell, or task manager, without having to click through multiple menus. You can also access this feature by pressing Windows + X.
Show file types
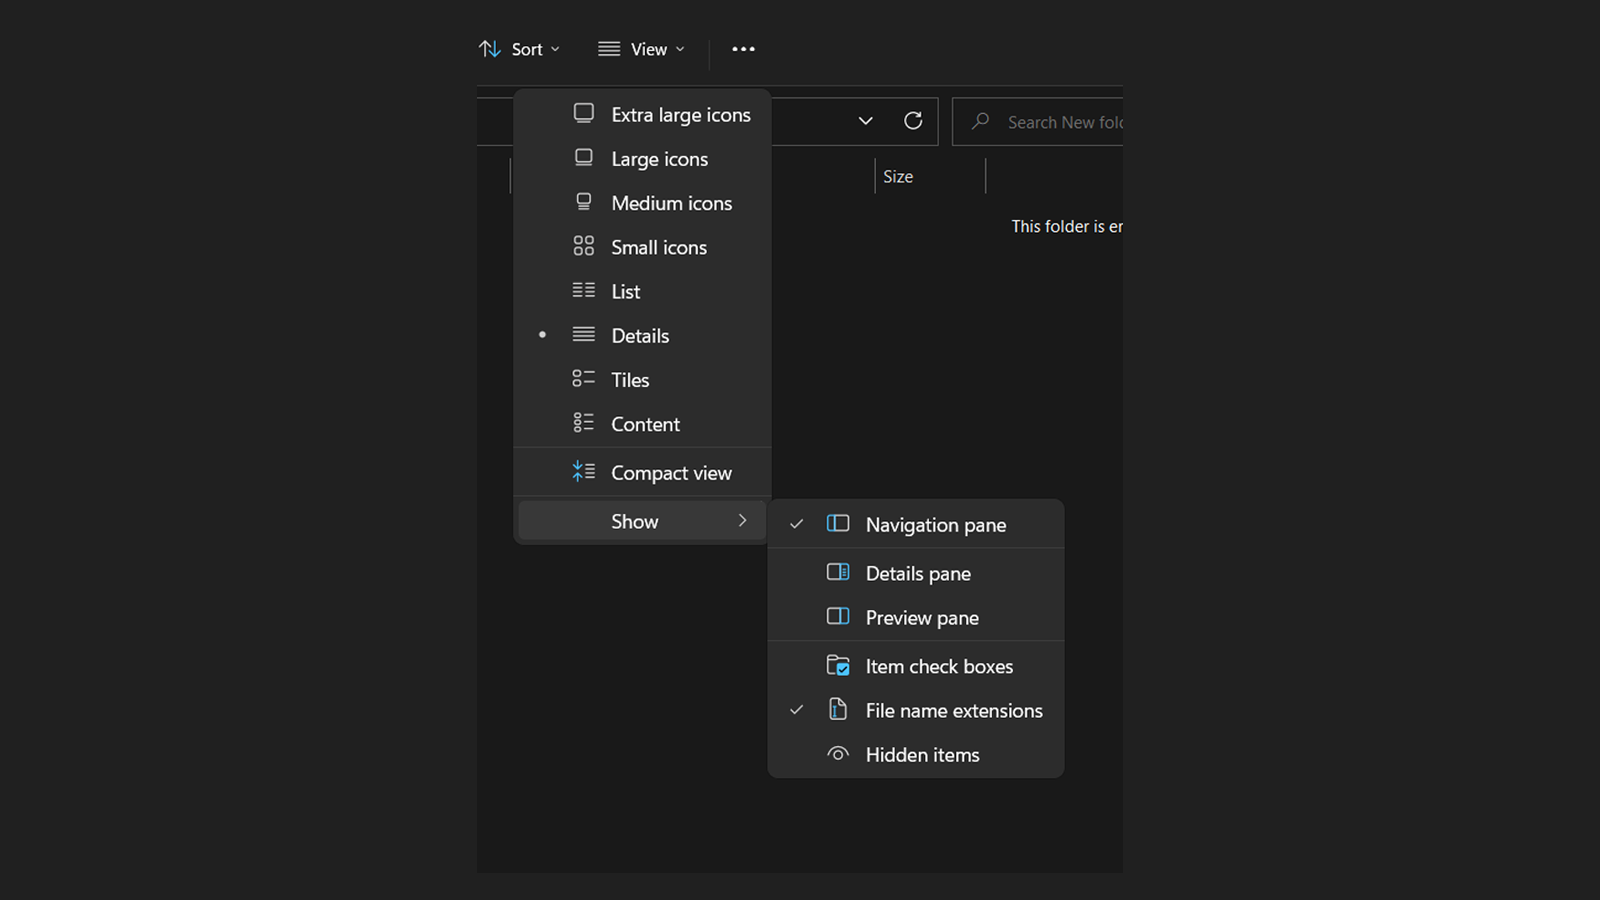
There are many times in every person’s journey they encounter a mishmash of different files with confusing, clashing names, created using a variety of software, ranging from Microsoft Word to Adobe InDesign. Knowing which type of file you’re looking for can be helpful, as it can be for Windows 11’s file explorer to tell you. To enable this, click on the View tab, scroll down to Show, then click on File name extensions. No matter the view you’re using, you’ll be able to tell what file type something is.
Activate accessibility settings
Rather than picking out just one accessibility feature, let’s look at the entire menu. To access it, open up your settings window and scroll down the list on the left-hand side. There, third from the bottom you’ll see the universal symbol for accessibility in tech: a little humanoid.
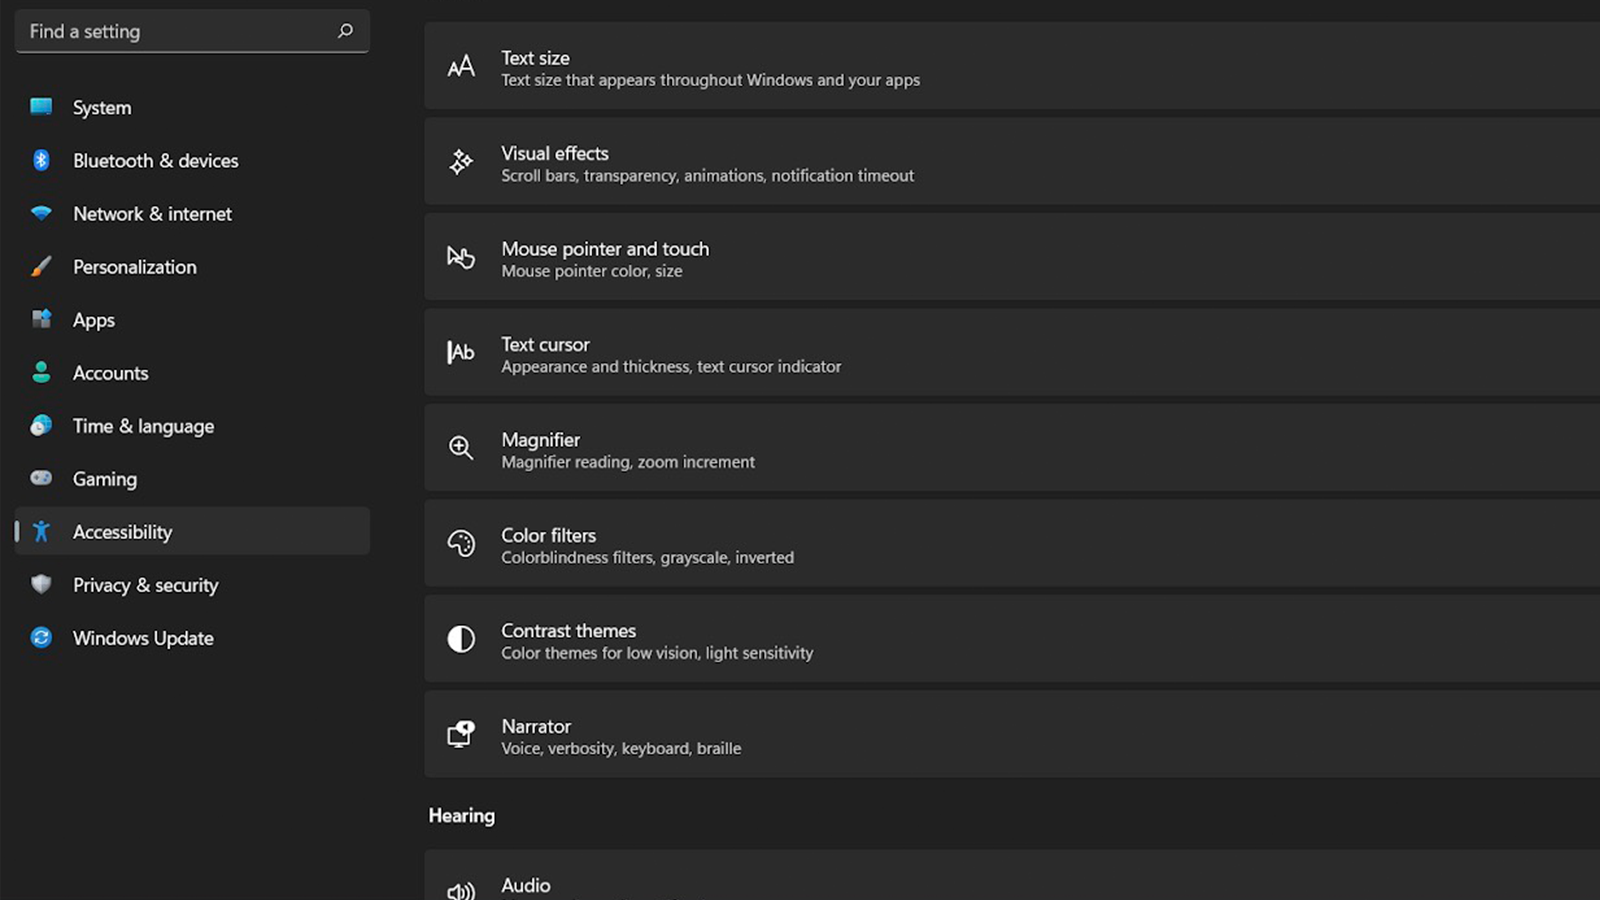
Click on that menu and you will see a plethora of options. You can do things like change the text size on your screen, enable eye tracking if that’s a need for you, and also change your screen’s contrast and colour filters.
Bind the Snippet tool to Print Screen
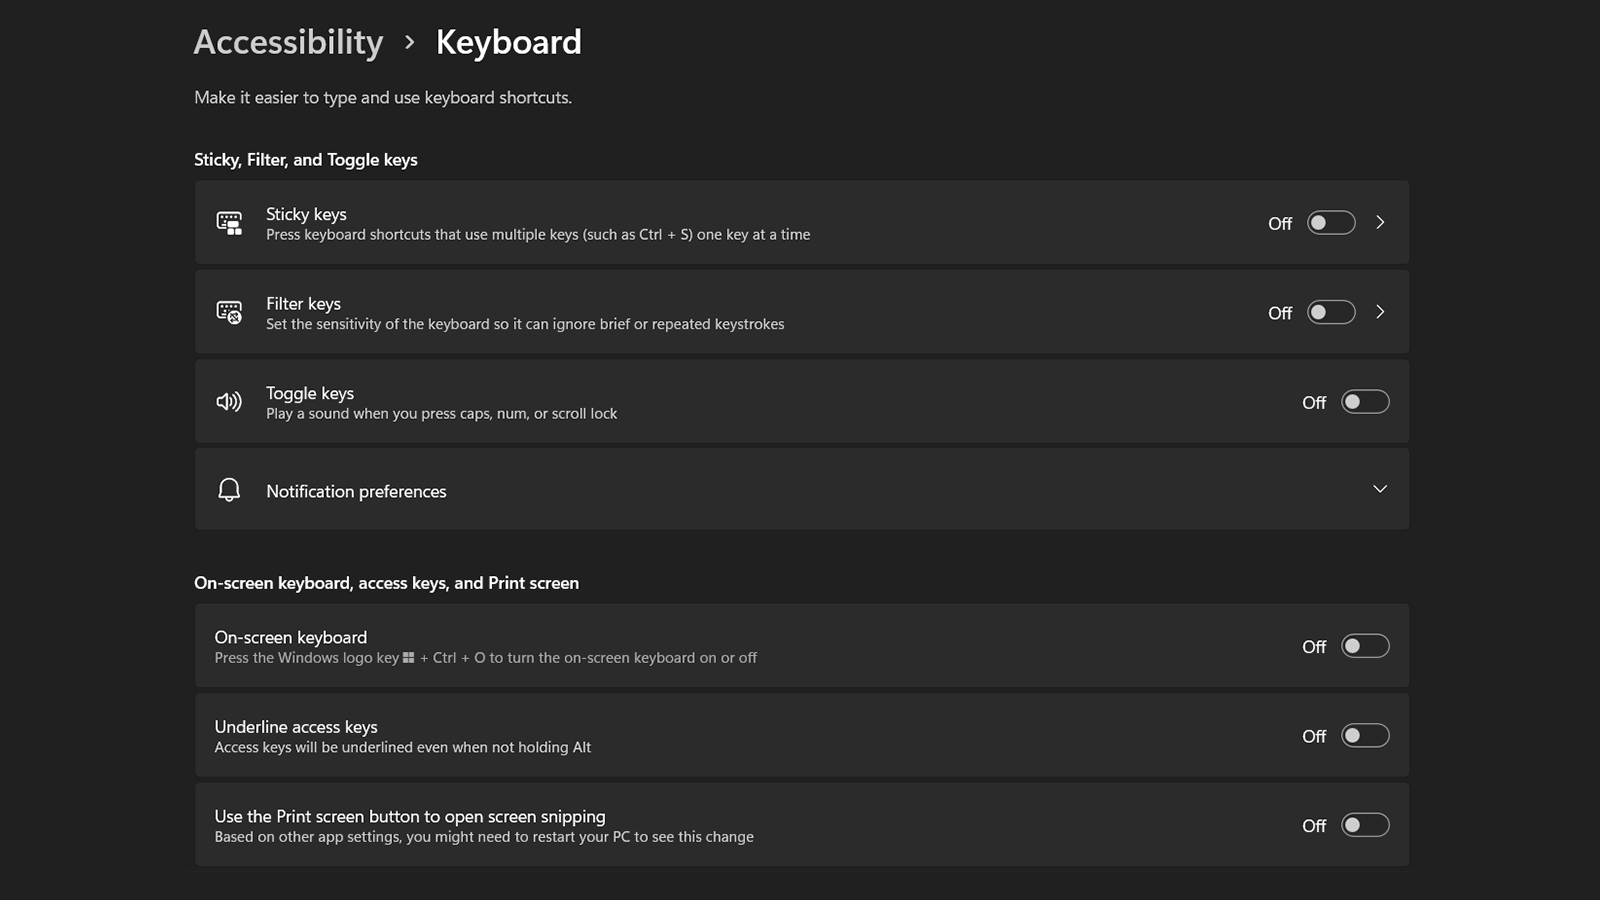
Many of the hidden Windows 11 tips and tricks centre around accessibility, and with good reason, but there’s one particular setting that’s invaluable regardless of whether these settings are normally part of your workflow. By clicking the toggle named ‘Use the Print screen button to open screen snipping’ you can make saving those screenshots just a little bit easier.
Snap Groups
As the demands on our time have gotten more intense, and our screen real estate has expanded to match, wrangling the items that clutter our digital workspaces can be complicated.
With Windows 11 you can snap windows to various layouts by hovering over the window icon in your top right. Once you’ve snapped those windows, they also appear as a snap group in your bottom bar. Segmenting your work in this way can allow you to quickly change how your screen appears depending on your tasks and workflow.

John Loeppky is a British-Canadian disabled freelance writer based in Regina, Saskatchewan. He has more than a decade of experience as a professional writer with a focus on societal and cultural impact, particularly when it comes to inclusion in its various forms.
In addition to his work for ITPro, he regularly works with outlets such as CBC, Healthline, VeryWell, Defector, and a host of others. He also serves as a member of the National Center on Disability and Journalism's advisory board. John's goal in life is to have an entertaining obituary to read.
-
 Asus ZenScreen Fold OLED MQ17QH review
Reviews A stunning foldable 17.3in OLED display – but it's too expensive to be anything more than a thrilling tech demo
By Sasha Muller
-
 How the UK MoJ achieved secure networks for prisons and offices with Palo Alto Networks
Case study Adopting zero trust is a necessity when your own users are trying to launch cyber attacks
By Rory Bathgate
-
 The race is on for higher ed to adapt: Equity in hyflex learning
WHITEPAPER Fulfil student and faculty needs
By ITPro
-
 Practical ergonomics guide for education
WHITEPAPER Save energy, focus, and promote overall well-being
By ITPro
-
 How to manage – and mitigate – performative working
Feature An increasing number of people are putting on a show of working, rather than actually getting on with it
By Peter Ray Allison
-
 The ultimate guide to 3D
Whitepaper Creative boost breaks
By ITPro
-
 Developing an end-to-end process for virtual photography
Whitepaper Sharing the best practice of creating production-quality photographs with software
By ITPro
-
 The case for an accelerated device refresh cycle
Whitepaper Achieving a more cost-effective device lifecycle overall
By ITPro
-
 Breaking down the barriers to 3D design
Whitepaper Designing for the future
By ITPro
-
 IDC: The business value of IBM Maximo
Whitepaper Integral to the transformation of asset management
By ITPro