How to add a printer to macOS
Everything you need to know about connecting a printer to an Apple computer via cable, Wi-Fi or IP address


Despite living in the age of the paperless office, there are still plenty of reasons to connect a printer to a Mac computer.
Whether you're a small business with printing needs, or an organisation using all-in-one machines, printers are still very much in season.
However, the way an Apple machine connects to external hardware is different to a Windows laptop or PC. To use a printer on any Apple computer, you must first add it to your list of printers, and you do this through the Printers and Scanner Preferences menu.

Normally, macOS will use AirPrint to connect to the desired printer, or it will download said printer’s software – or ‘printer driver’. Apple advises not to install the software that comes with your printer or what is recommended on the manufacturer’s website. Instead, follow the instructions below for USB and wireless connections.
Setting up a printer on Mac via USB
As mentioned above, in most cases macOS will automatically detect the new printer – it may just be a case of updating your software and then selecting the new external hardware.
However, this might not work for all printers, and so you will need to do the following:
- Start by updating the software on the printer: you may need to check with the manufacturer, via its website, to see what updates are available for the printer you have.
- Then connect the printer to your mac device with a USB cable. If you have a Macbook with a USB-C slot, you may need to use a multiport adapter and it is also worth connecting your laptop’s power capable and keeping it charged while you print.
- Make sure your printer is on and ready to go – check it has ink or toner cartridges and paper.
Once it's all plugged in, you should see a pop-up message prompting you to download the new software. Go ahead and download it. Once finished you should be ready to start printing.
Get the ITPro daily newsletter
Sign up today and you will receive a free copy of our Future Focus 2025 report - the leading guidance on AI, cybersecurity and other IT challenges as per 700+ senior executives
Setting up a printer on a Mac wirelessly
Things should be a bit more straightforward for printers that connect over Wi-Fi; if both printer and laptop are using the same Wi-Fi then theoretically they should be able to see each other.
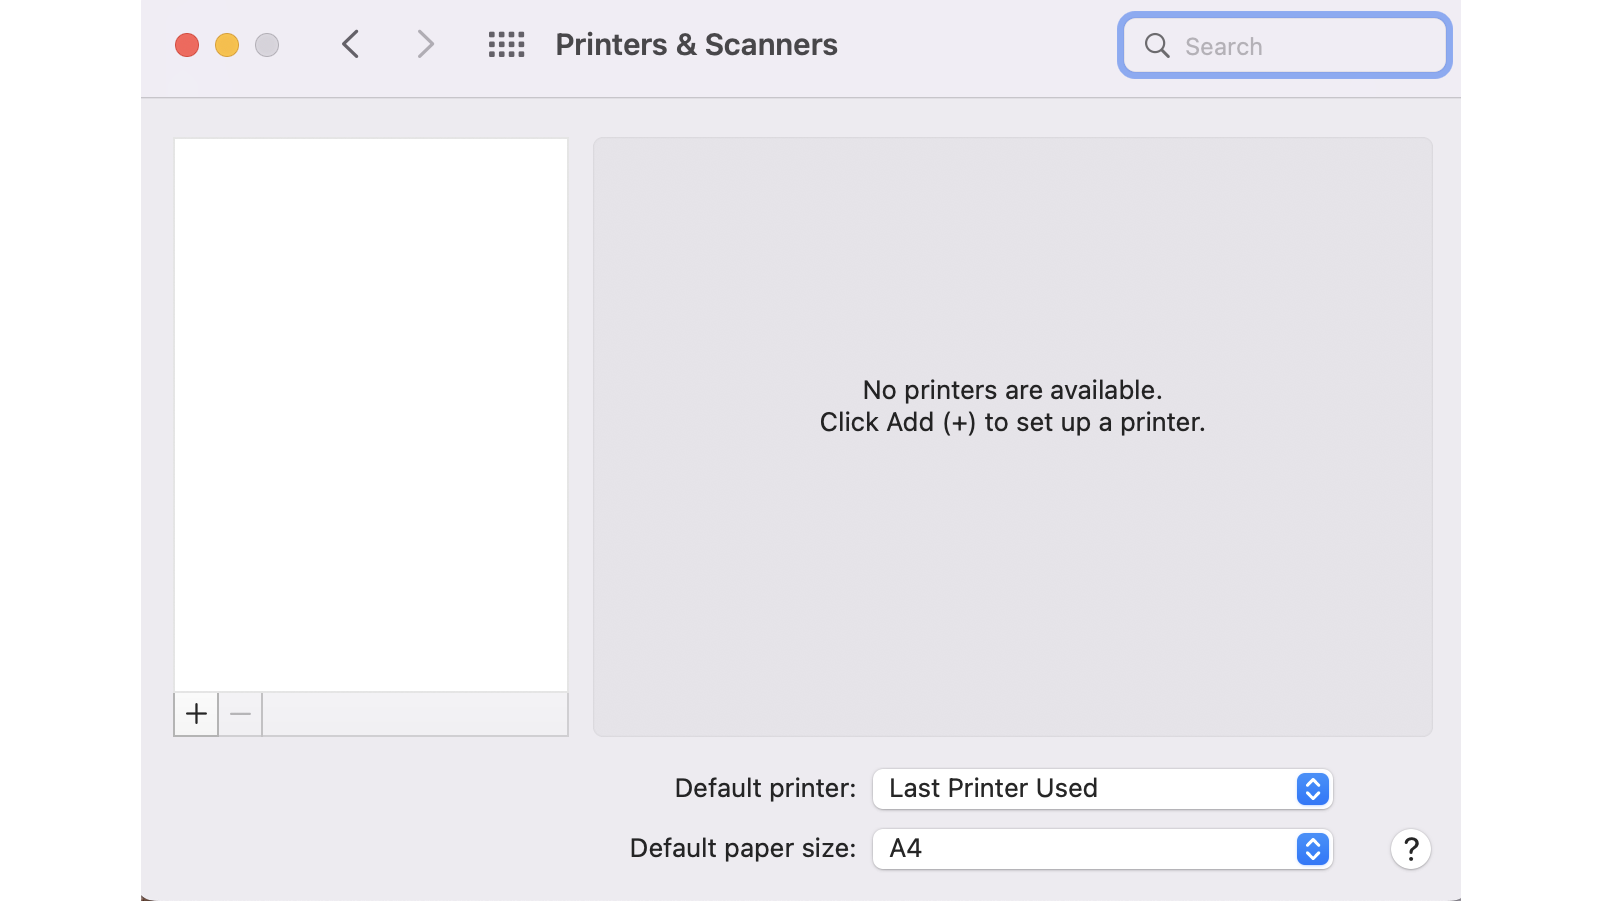
If you need to check, however, go into ‘System Preferences’ and click on ‘Printers and Scanners’. If there is no printer listed here then you will need to add it yourself.
Start, again, by updating the printer to the latest software that’s available. If it’s a Wi-Fi printer, you may still have to connect it via a USB cable initially to set up ‘Wi-Fi printing’.
Once it is connected, you need to install the Mac software that came with the printer and use the setup assistant to connect the printer to your Wi-Fi network. Once that is completed you can remove the USB cable.
To add the printer to your list of printers, you need to go back into System Preferences, then Printers and Scanners and select it from the drop-down list. If it still doesn’t appear you can click the add button, which appears as a ‘+’, and all available printers should appear in a dialogue box.

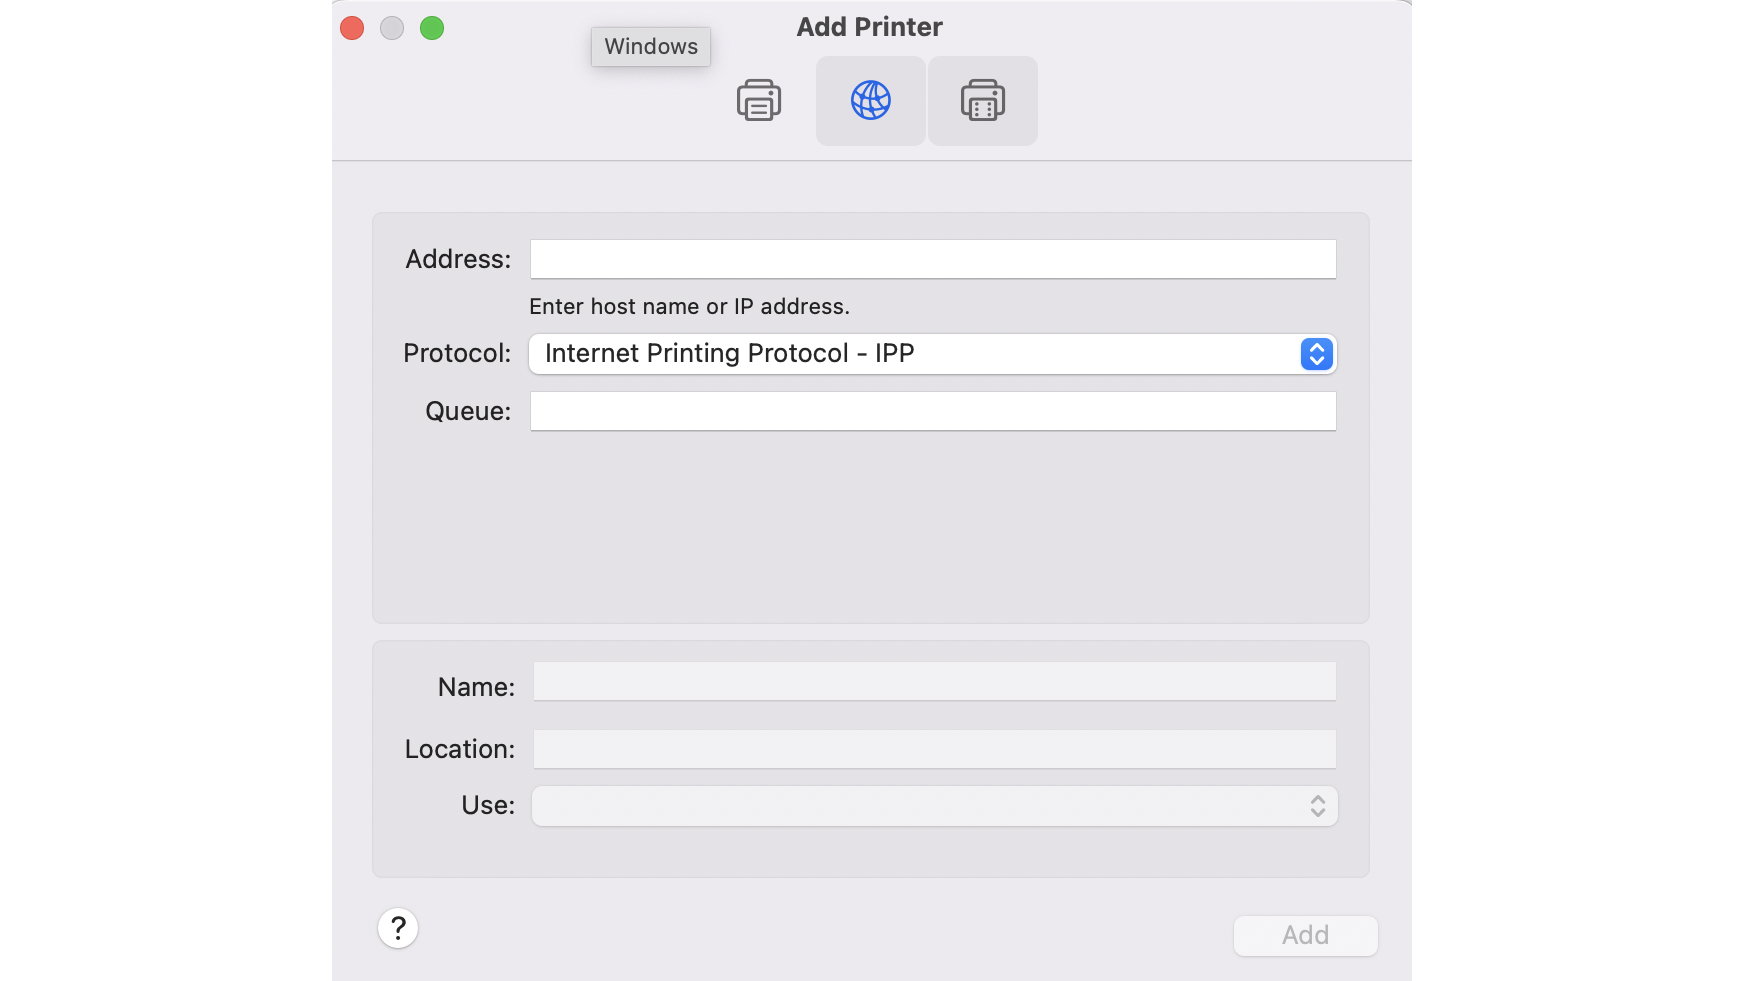
If, however, your printer still doesn't appear, you may need to add the device via its IP address. However, it must support printing protocols - AirPrint, HP Jetdirect, Line Print Daeman, or the Internet Printing Protocol.
Click the add button and select the IP button, which should have the globe symbol. Then input the printer's information into the table.
Bobby Hellard is ITPro's Reviews Editor and has worked on CloudPro and ChannelPro since 2018. In his time at ITPro, Bobby has covered stories for all the major technology companies, such as Apple, Microsoft, Amazon and Facebook, and regularly attends industry-leading events such as AWS Re:Invent and Google Cloud Next.
Bobby mainly covers hardware reviews, but you will also recognize him as the face of many of our video reviews of laptops and smartphones.